


Yarn Requirements:
You will need four different colors of yarn to create the exact color block scheme as myself.
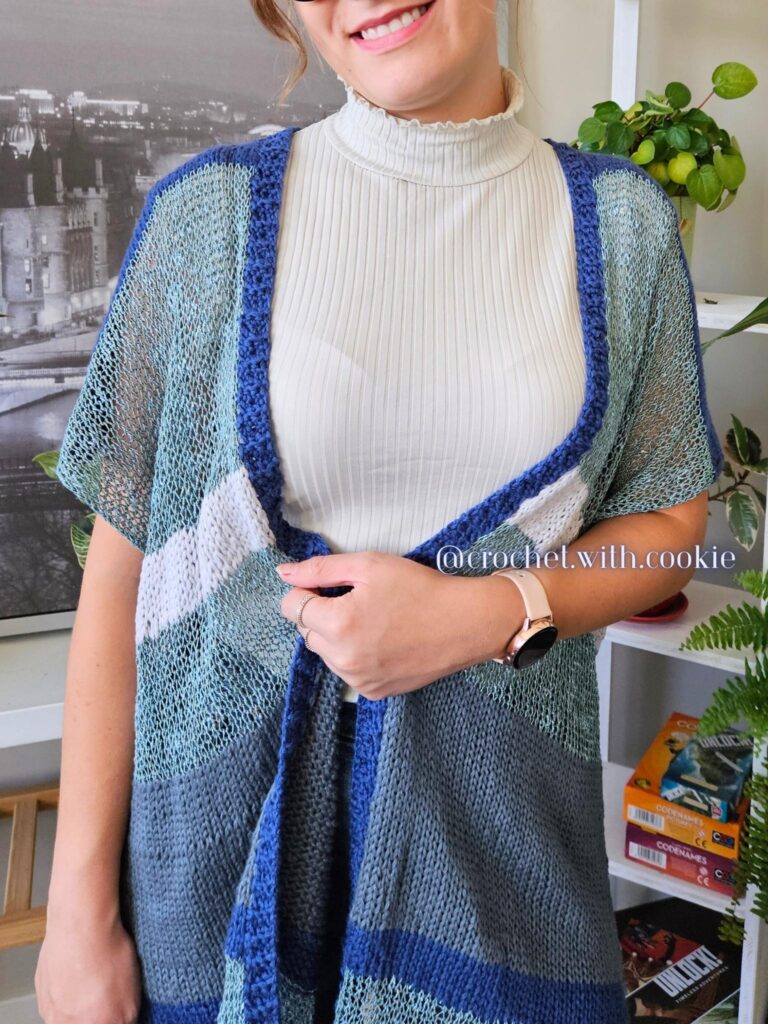
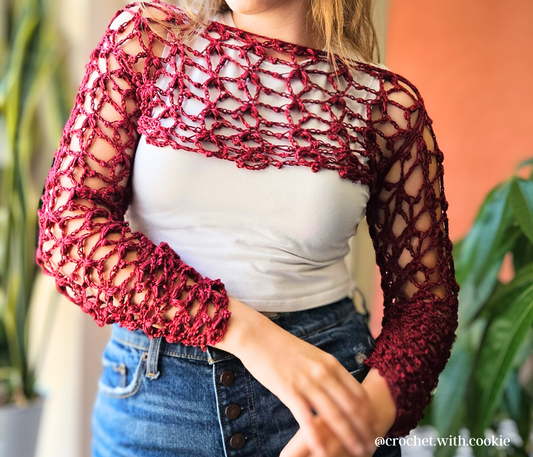
I am using specifically three of the same type of yarn - but different colors, and then one other stand out yarn. I am using the standout yarn in a much thinner weight than the other three - to create a loose fish net type texture just for parts of the garment.
I am using the Creme Cotton - By Loops & Threads (weight 4) for the three main colors. And using Seduce - By Berroco (weight 3) for the thinner yarn.
For me:
Color 1 - Navy (Crème Cotton - Loops & Threads)
Color 2 - Dreams (Seduce - Berocco)
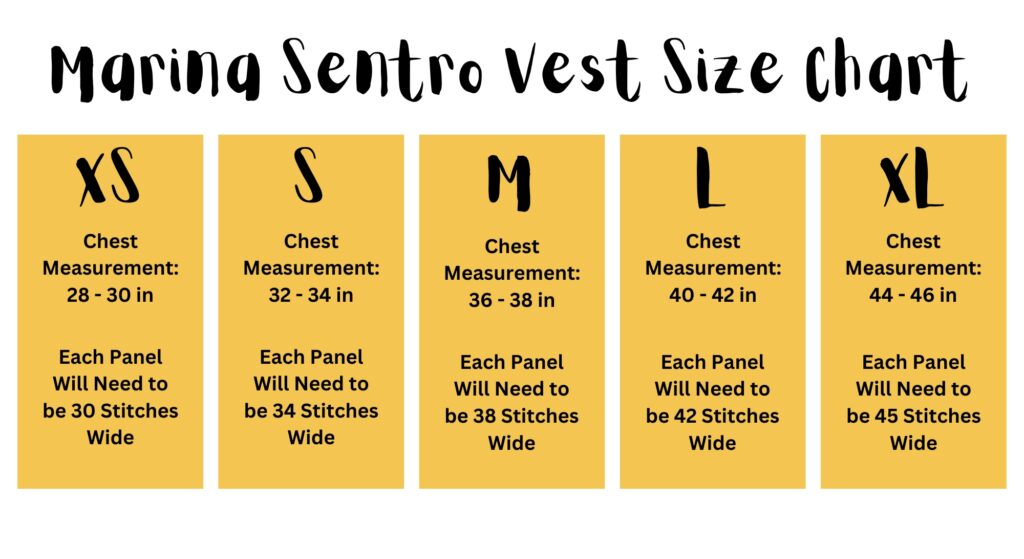
Yarn Requirements According to Size:

Sizing Chart:
Before starting the project, you will need to choose the proper size for your garment. Please keep in mind that each size has 6 inches of ease added into the calculation - if you would like less ease then size down. If you would like your garment to be even more loose - then size up.
Please note the number of stitches required for each size below.
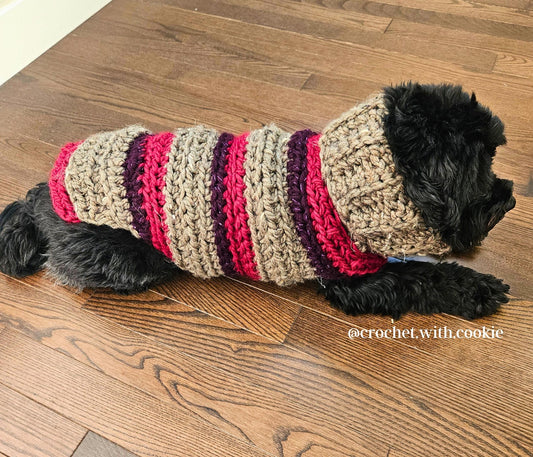
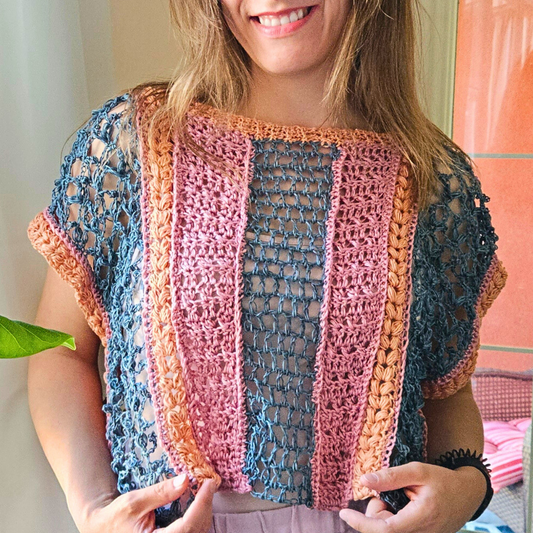
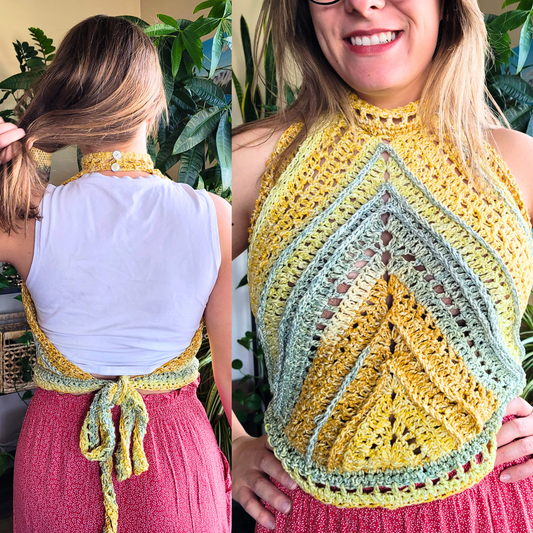
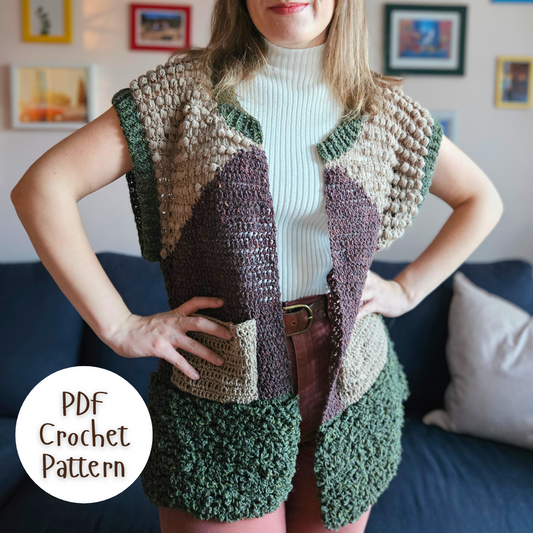
Marina Sentro Vest Pattern Begins Here:
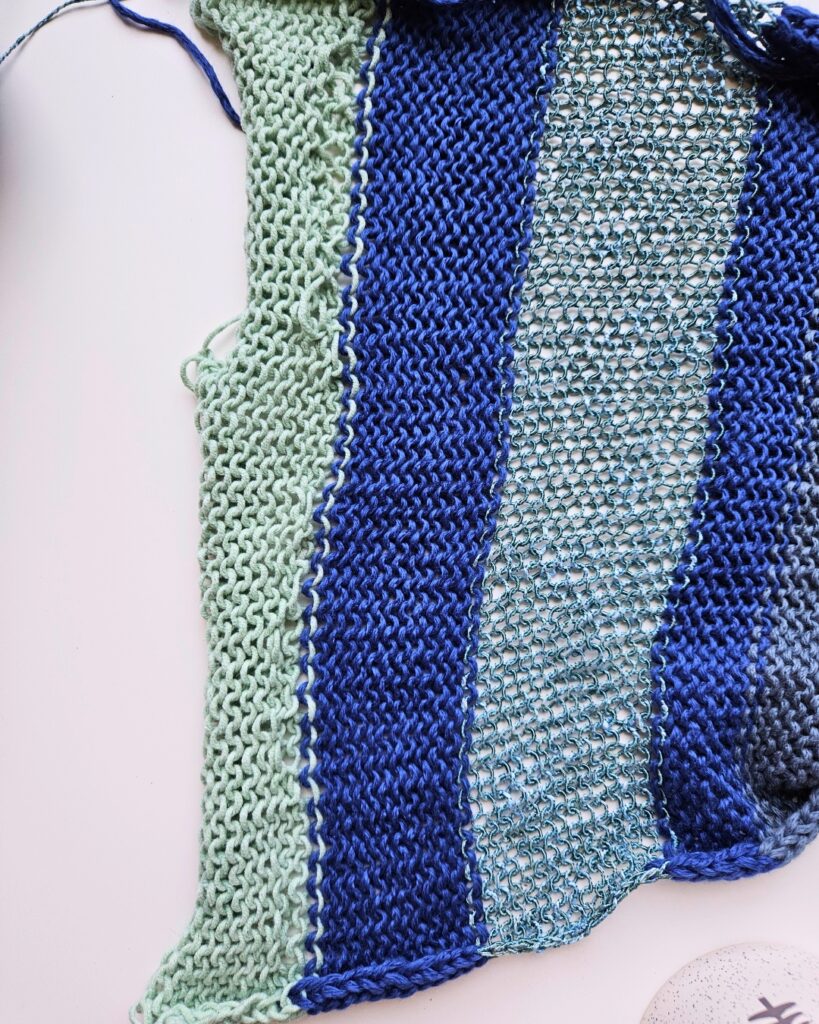
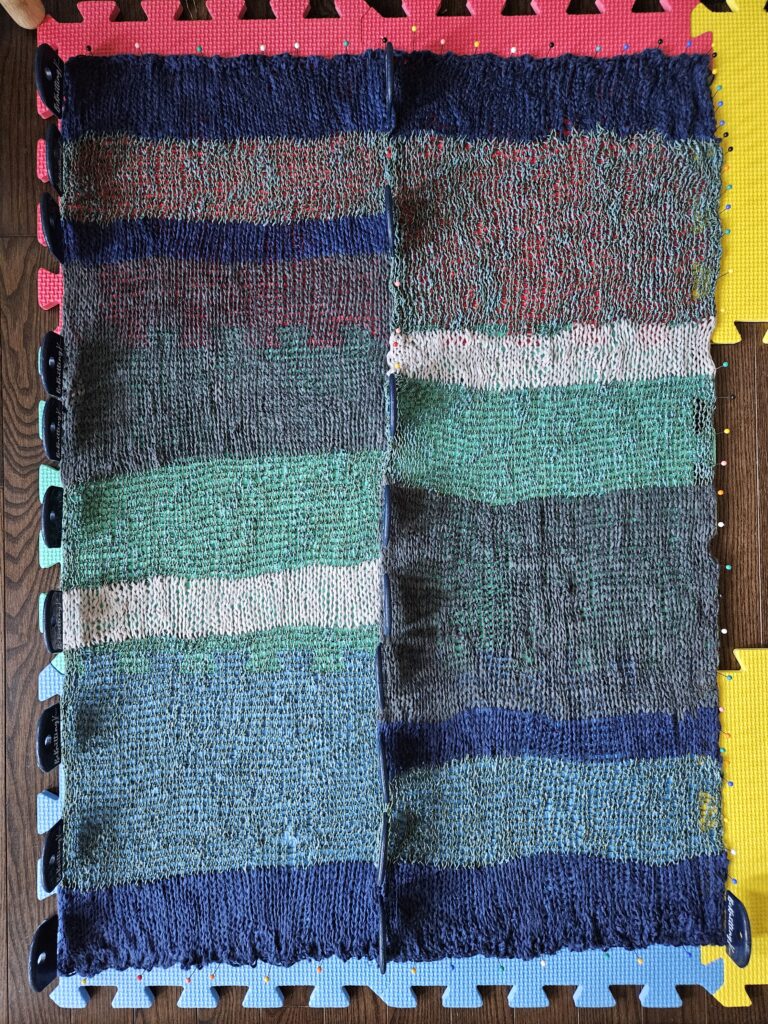
Step 1: Creating the Panels
Cast on your chosen number of stitches in scrap yarn.
Knit about 10 rows using scrap yarn, then change colors to COLOR 1.
Knit 12 rows in COLOR 1.
Change colors to COLOR 2 (the light weight yarn), knit 32 rows.
Continue with the pattern depicted on the side. Changing colors then knitting the corresponding number of rows.
After you have completed the entire pattern, finish off with 10 - 15 more rows using scrap yarn.
Create 4 identical panels.

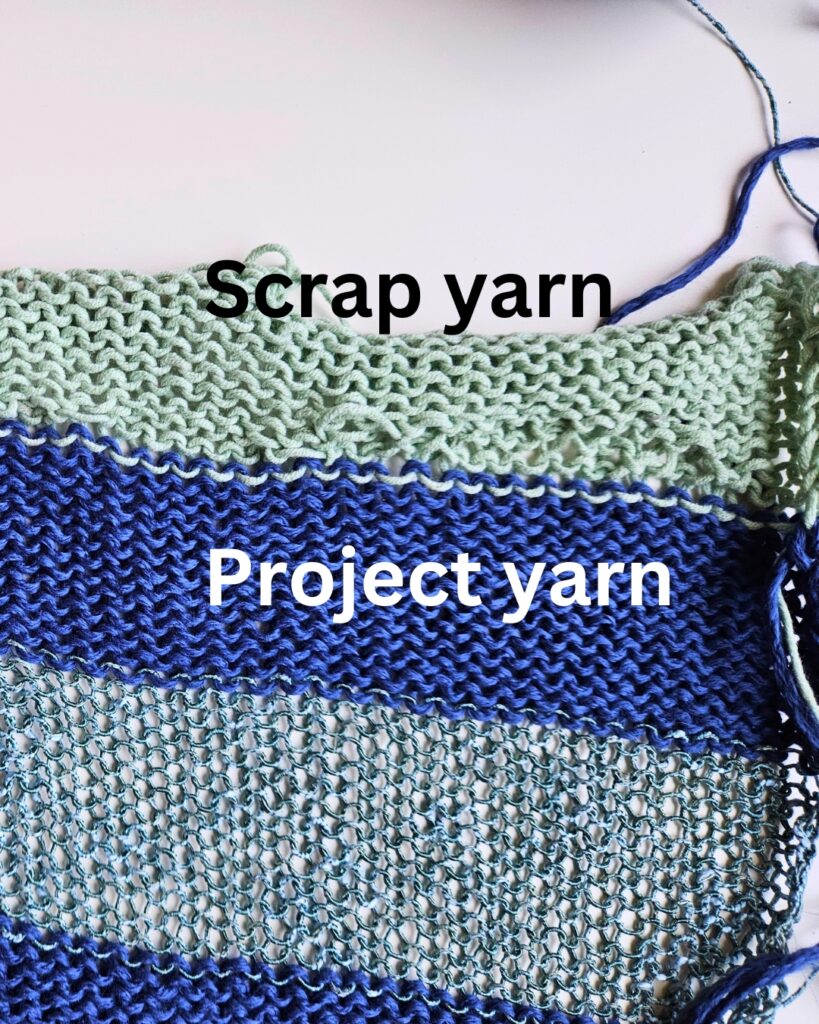
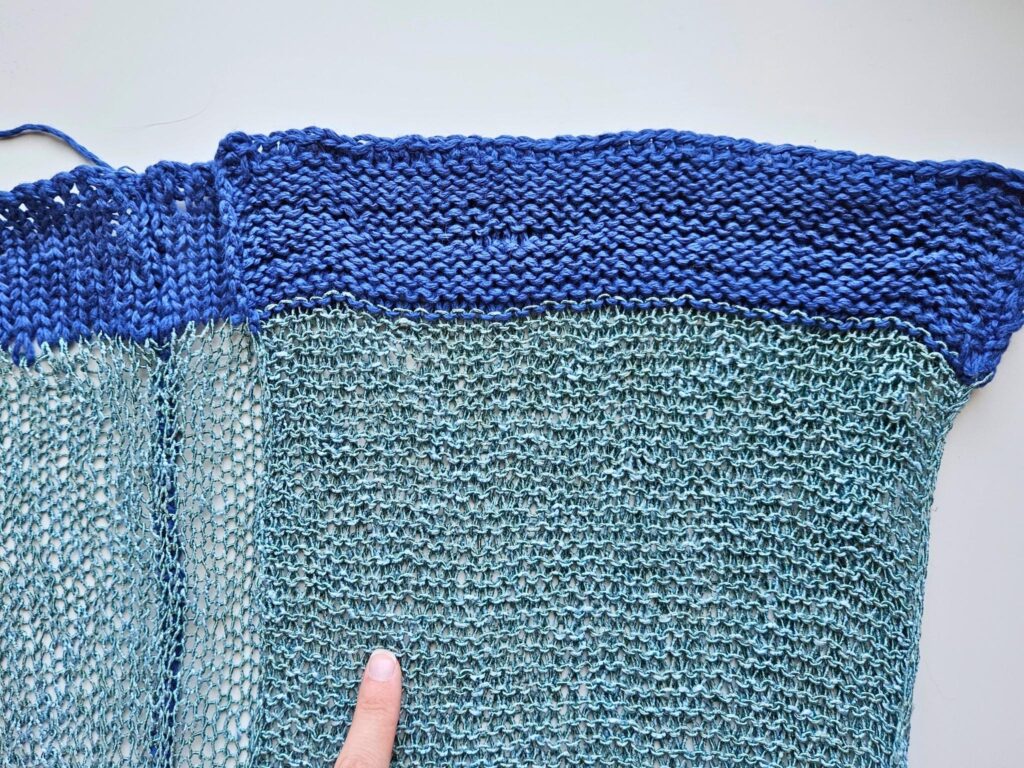
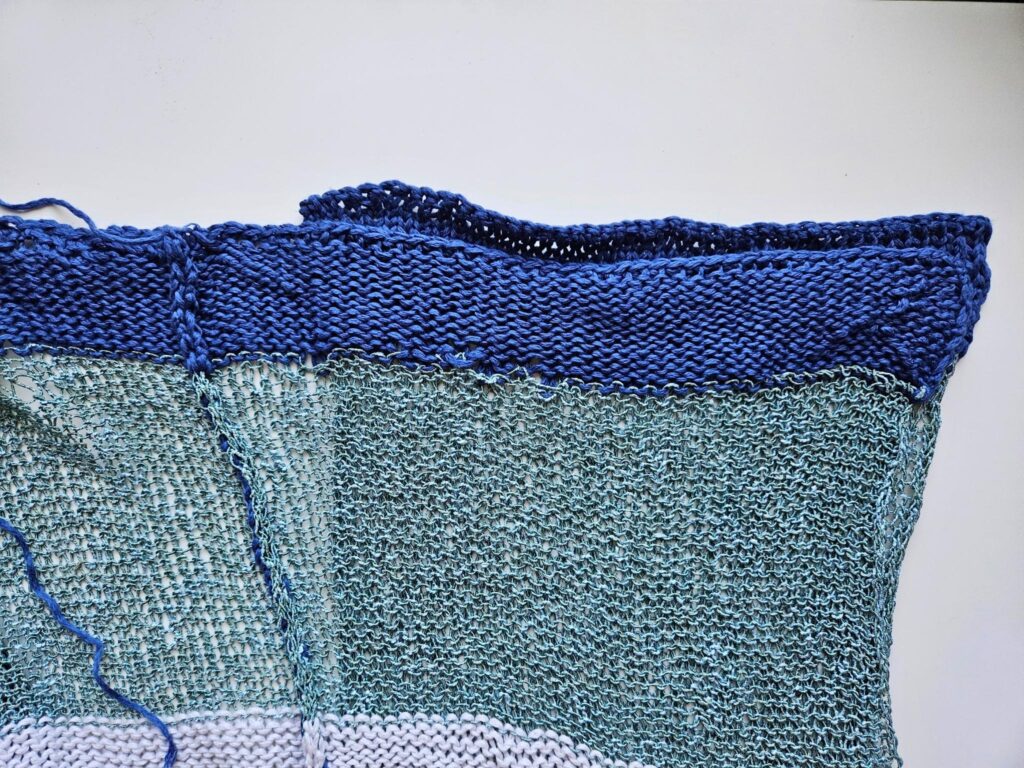
Step 2: Removing Scrap Yarn
Now that your panels are all finished, we need to remove the scrap yarn at the top and bottom of each panel.
From the wrong side of the panel, take a look at the row where your scrap yarn ends, and your actual project yarn begins.
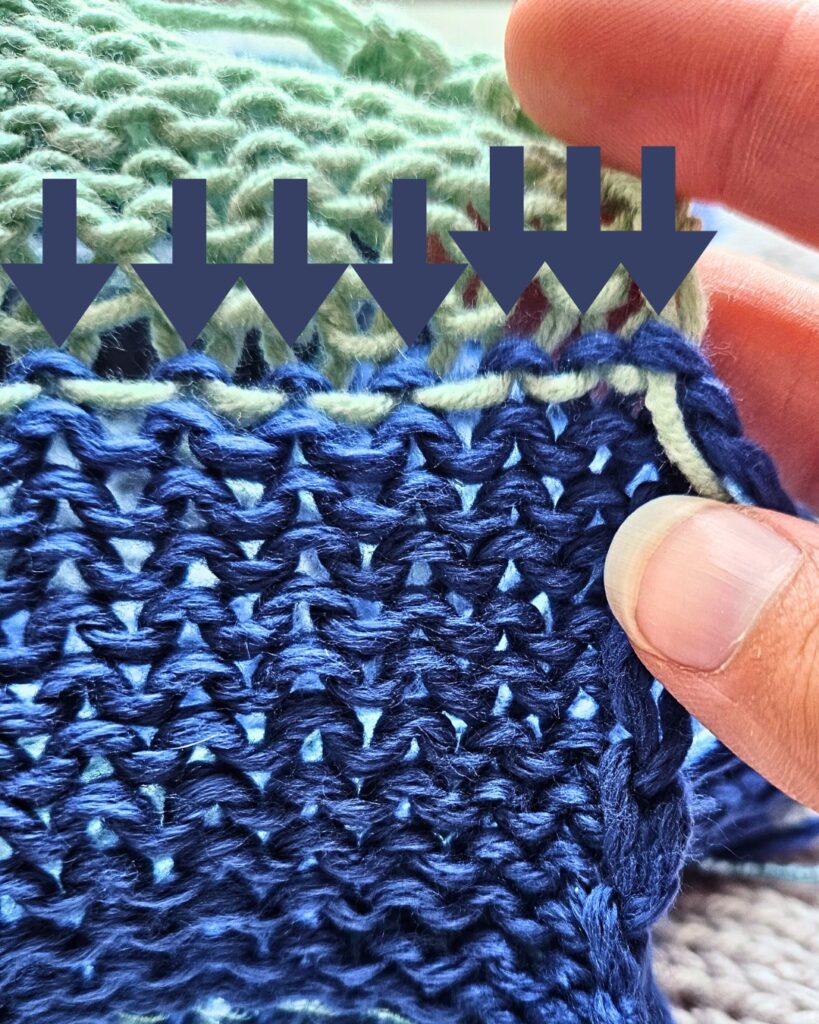
We are going to sc in each of the stitches in the very first row of actual project yarn that you can see.
Detailed Row instructions:
Insert hook into the first st of project yarn, ch 1, sc across in each st of project yarn, then when you get to the last st, sc in the last st and cut yarn, fasten off.
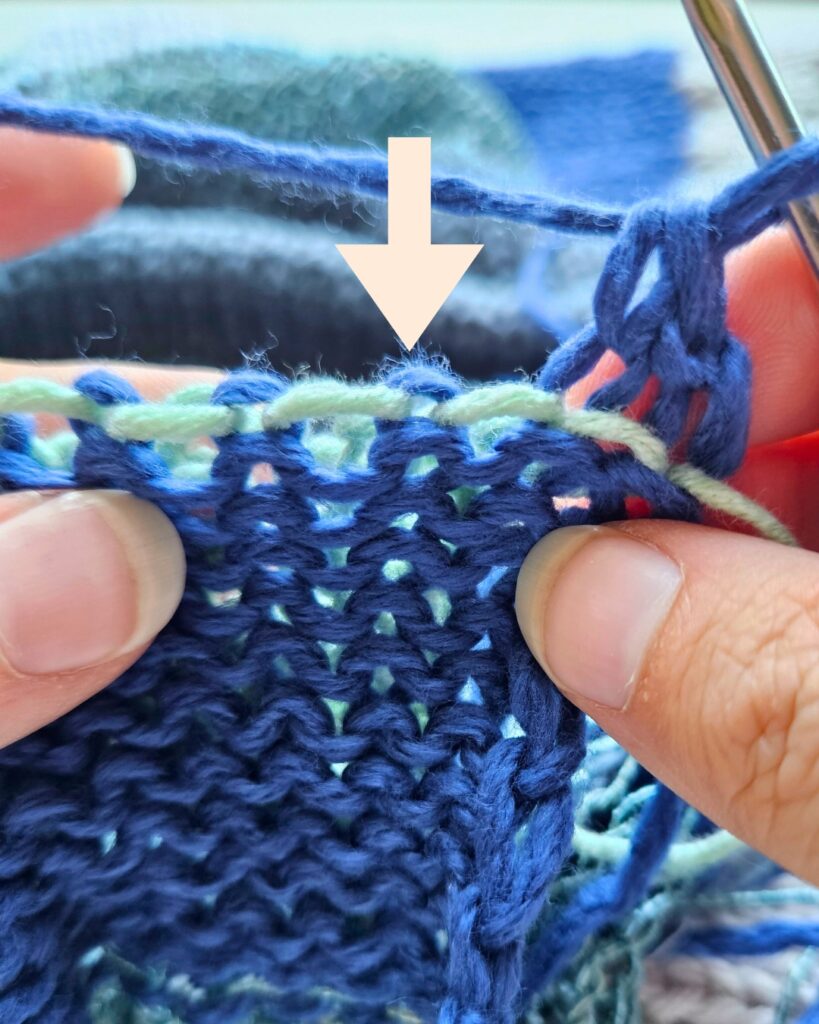
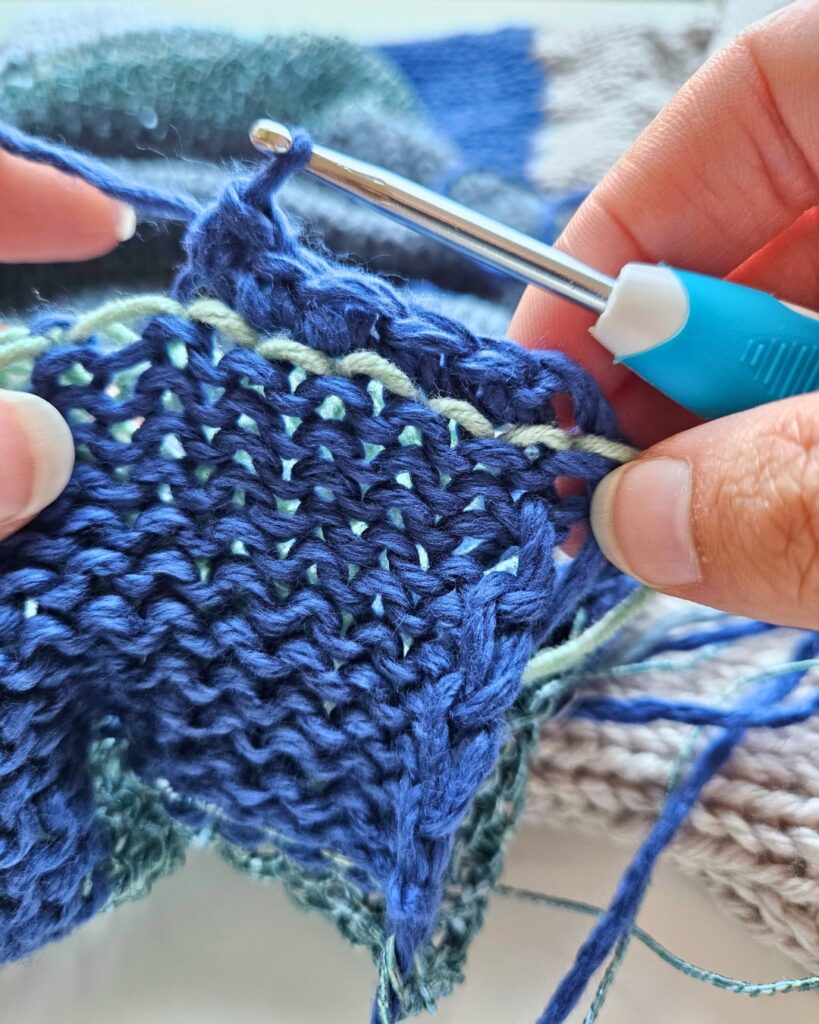

Before the Sc row (left) --------------- After the Sc row (right)

After the sc row has been completed, your project yarn is secured, so you can go ahead and remove all scrap yarn.
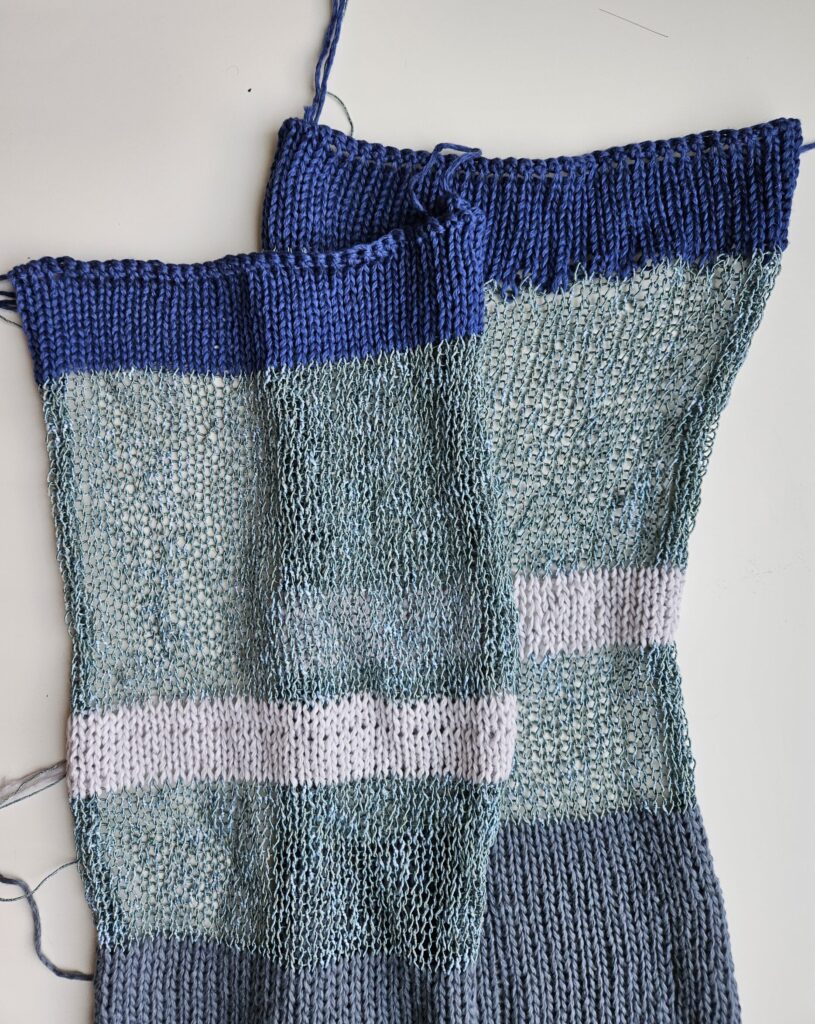
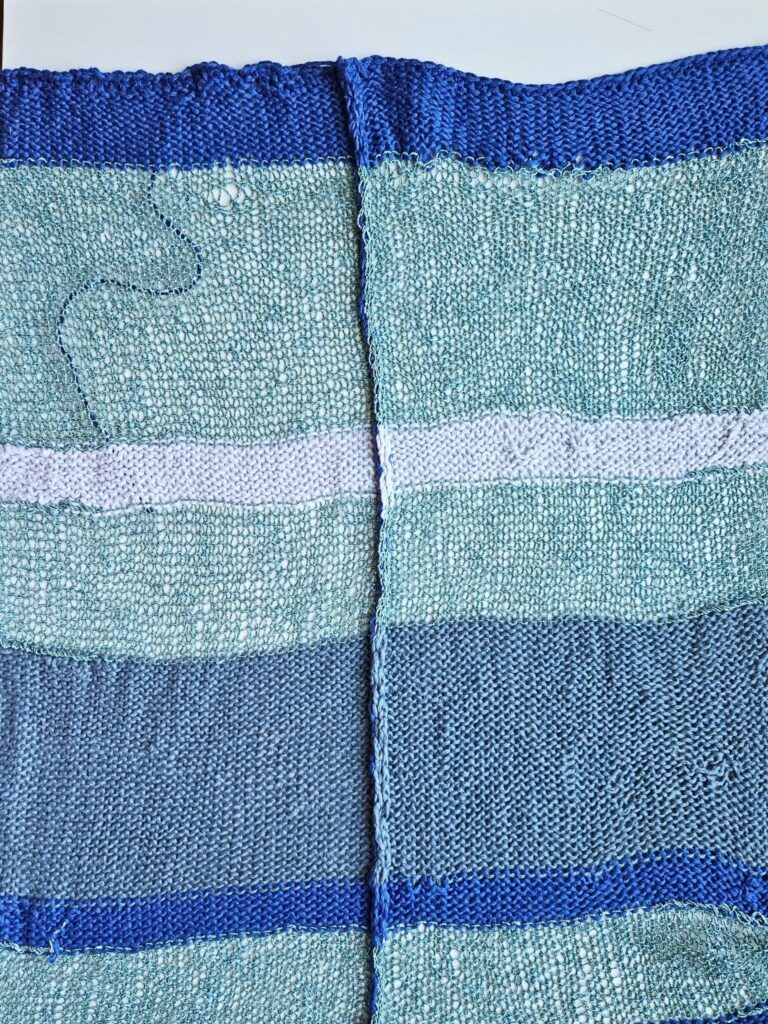
Step 3: Blocking the Pieces
Before assembling your garment, you must block the pieces. The circular knitting machines create a bit of a rolled edge and its important to straighten out the edges before assembly.
To block the pieces, submerge the panels in water, then gently wring out excess water using a towel. Then lay flat on blocking mats and pin in the exact shape/length/width that you would like the piece to look like after it is dry. Make sure all pieces are shaped exactly the same.
Even though I don't have the perfect blocking set - and if you don't either - I used some of the blocking combs that I had, and then used just regular sewing pins for the rest - and it worked like a charm. I also didn't have enough exercise mats, so I blocked two pieces at a time. If you don't have blocking mats, you can also use exercise mats like me, or you can even layer multiple towels, and pin your panels onto those!
Step 4: Assembly
Once your pieces are all flat, all edges are unrolled and they have fully dried - you are ready to assemble your vest!
To assemble the back:
- Lay two panels together (fronts facing), then sl st across to connect them together.
To assemble the front - we are going to gather the two smaller panel slightly at the top seam to account for the gap at the neckline.
Right Side - Front Panel Assembly
Place the large back panel with the RS facing you, then place the smaller front panel on top of the right half of the large panel, with the WS of the front panel facing you.
Then, insert hook through both panels, starting on the far right upper corner for the seam, *sl st 6, on the 7th st, insert hook through the top panel, then into the SAME st as the last one on the back panel, * repeat this sl st sequence until the end of the row. It is completely fine if you end up stopping in the middle of the rotation.
Cut yarn, fasten off.

Left Side - Front Panel Assembly
To assemble the left side of the front, place the small left over panel flat in front of you with the RS facing. Then on top, place the large back panel (it should already have the one panel attached now) with the WS facing you. Then begin on the upper right hand corner again, but this time the smaller panel is underneath the larger one.
*Sl st 6, then on the next one, insert hook through the SAME st as before (so again the 6th st) but then sl st through the NEXT st (7th st) of the back panel*, repeat the sequence until the end of the row (its okay to end at any point, doesn't have to be a full repetition.
Cut yarn, fasten off.

Sides:
Try on your Marina Sentro Vest, then decide how much to sl st together on the sides.
From the WS, sl st the sides together.
Step 5: Ribbing
The ribbing is completed with a crochet hook, and one of the yarns that you used in the garment.
Place the vest in front of you, with the front facing you. Then insert hook into lower left corner of the top panel - with the RS facing you, and begin there.
Row 1:
Insert hook, ch 4, sc in the 2nd loop from hook, sc, sc, then sl st into the next 2 st on the actual panel, turn
Row 2:
Sk those two st where you sl st last rnd, sc blo into the next 3 st, ch 1, turn
Row 3:
Sc blo into the next 3 st, sl st into the next 2 st on the garment, turn
Repeat rows 2 & 3 all around the garment - except when you get to a corner.
At the corners : When you are on row 3 and you sl st into a corner, do not sl st again, and go directly to row 2, then complete 3 more repetitions of row 2-3 (at the end of each row 3, sl st only once, directly into the corner st). Once this has been completed at the corner go back to repeating rows 2-3 along the straight parts of the garment.
Continue all the way around. Once done, cut yarn, fasten off.
Weave in all ends - and you are all done!