
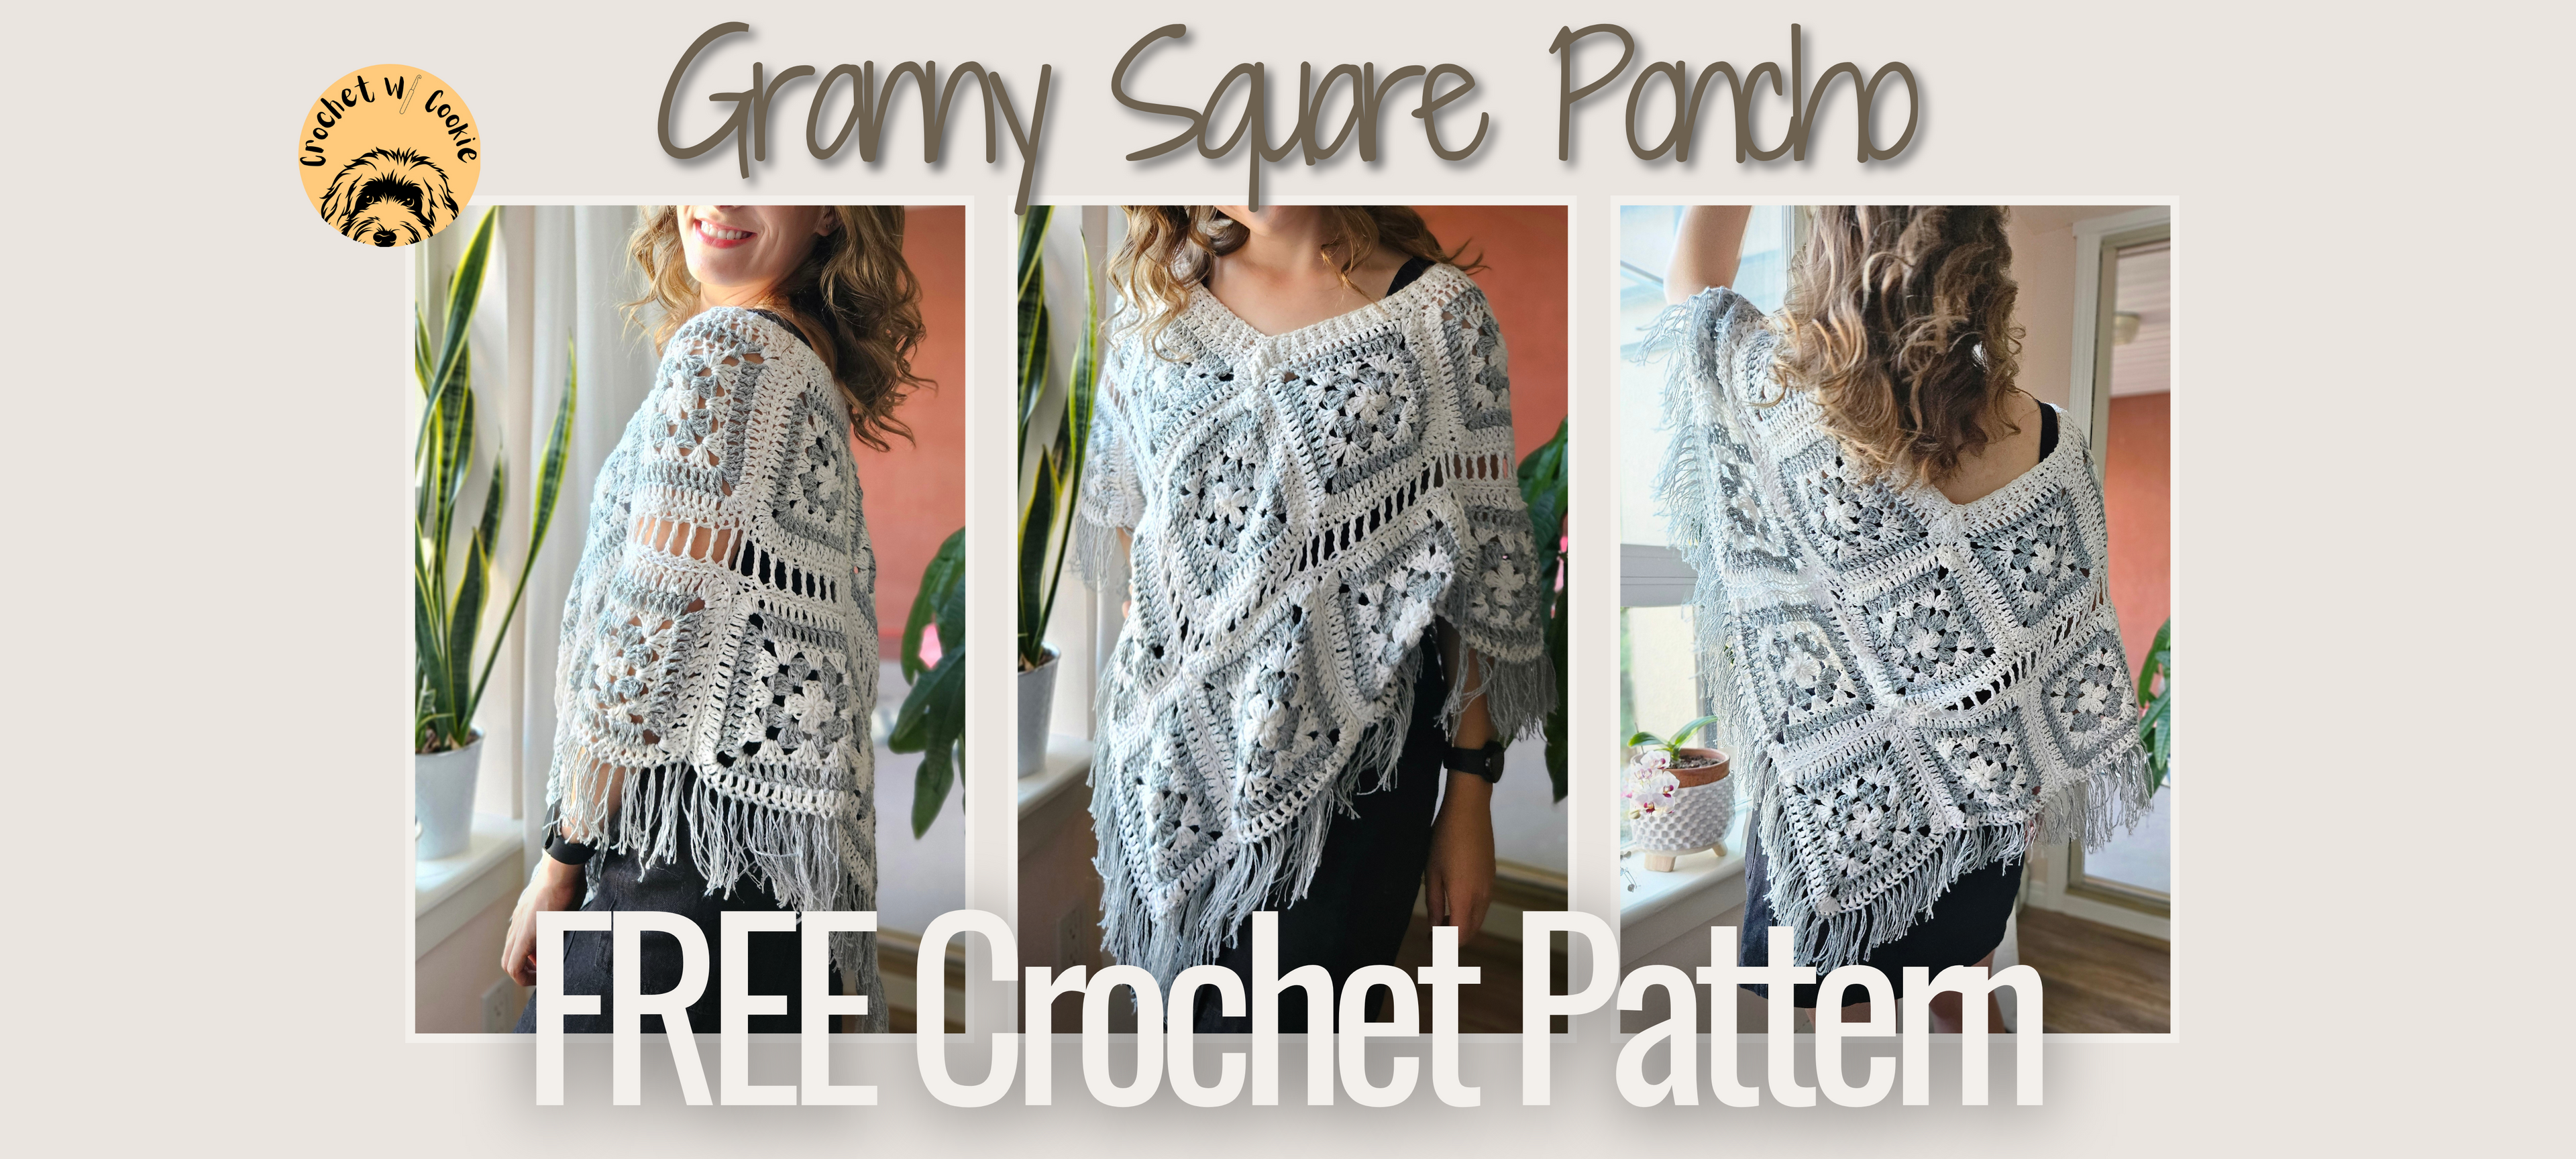


When you're ready, start scrolling and let's jump right in!!
Yarn Requirements:
The amount of yarn that you will require will vary greatly because of the fact that this is a made-to-measure pattern and because length and width are both adjustable!
Here are some estimates that I have come up with for what you might need depending on size :)
S – 350 g
M – 400 g
L – 450 g
XL – 500 g
XXL – 550 g
3XL – 600 g
4XL – 650 g
5XL – 700 g
S – 12.3 oz
M – 14.1 oz
L – 15.9 oz
XL – 17.6 oz
XXL – 19.4 oz
3XL – 21.2 oz
4XL – 22.9 oz
5XL – 24.7 oz
Choosing a Hook Size:
If you are making a summer garment, and would like for the poncho to drape really nicely (not be super stiff and rigid) I recommend sizing up your hook a bit from the hook size you'd normally use with your chosen yarn.
I am sizing up my hook to ensure that my granny squares are not super stiff, but they are loose and drape the body in a flattering way.
Especially if you are creating a summer garment, I would strongly recommend making sure that you achieve a really loose tension for the granny squares - which can be accomplished by sizing up that hook!
If you are creating a fall/winter poncho you don't HAVE to size up your hook, may still choose to though!
Crochet Skills Required:
To create this cute and VERY simple pattern, you do need to know a few basic skills!
If you are an absolute beginner though... not to worry!!
I have created a youtube video for EVERY. SINGLE. SKILL. you will need to create this pattern!
Just keep scrolling, and you'll find them linked at each step!
Videos:
If you are a beginner, please check out these videos to help you :)
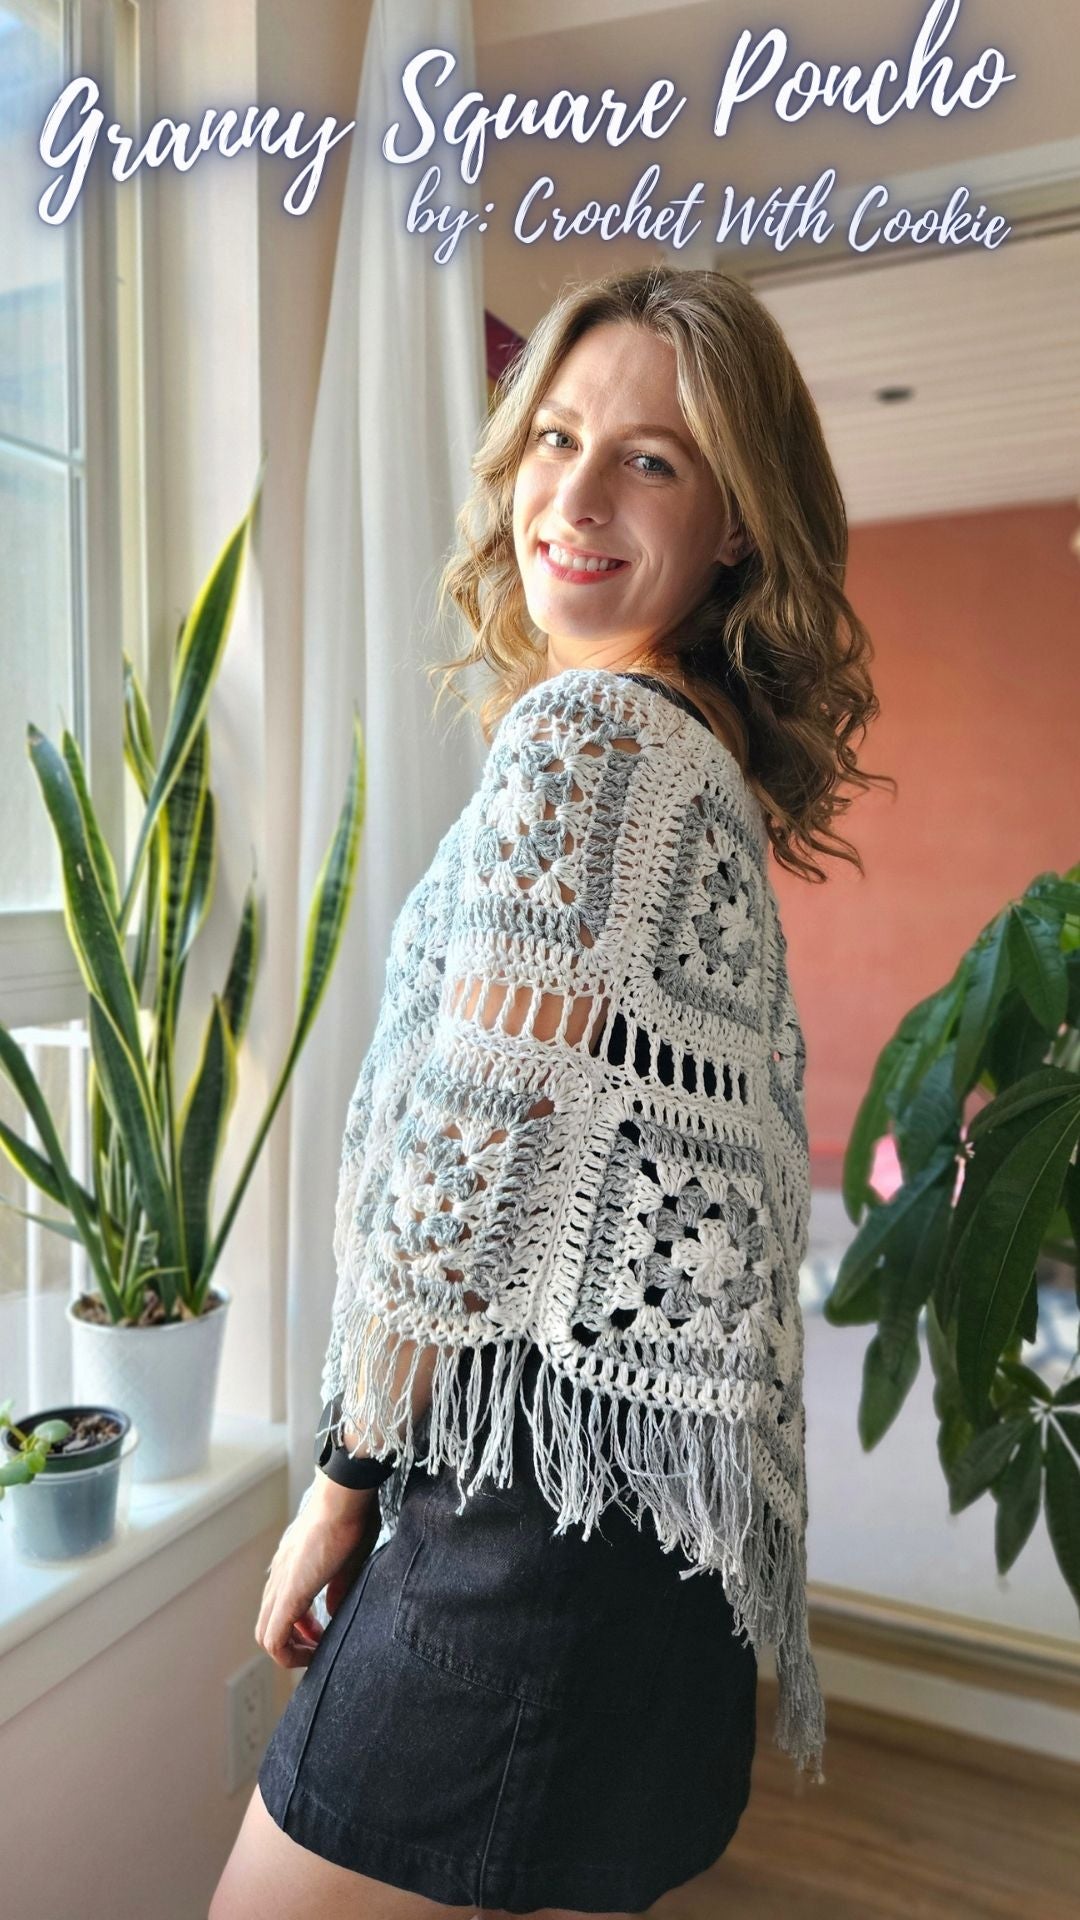
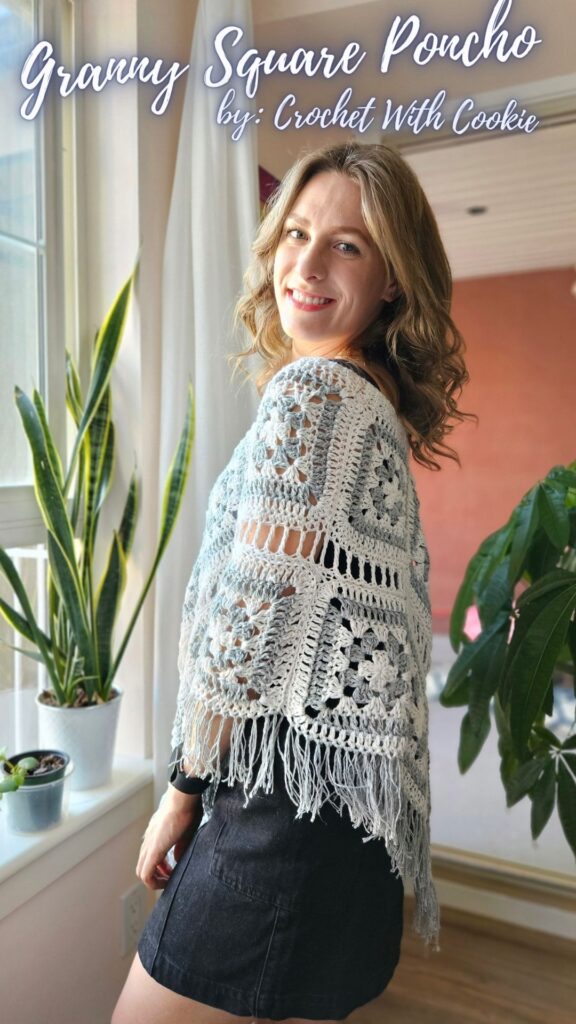
Granny Square Poncho Free Crochet Pattern Begins HERE:
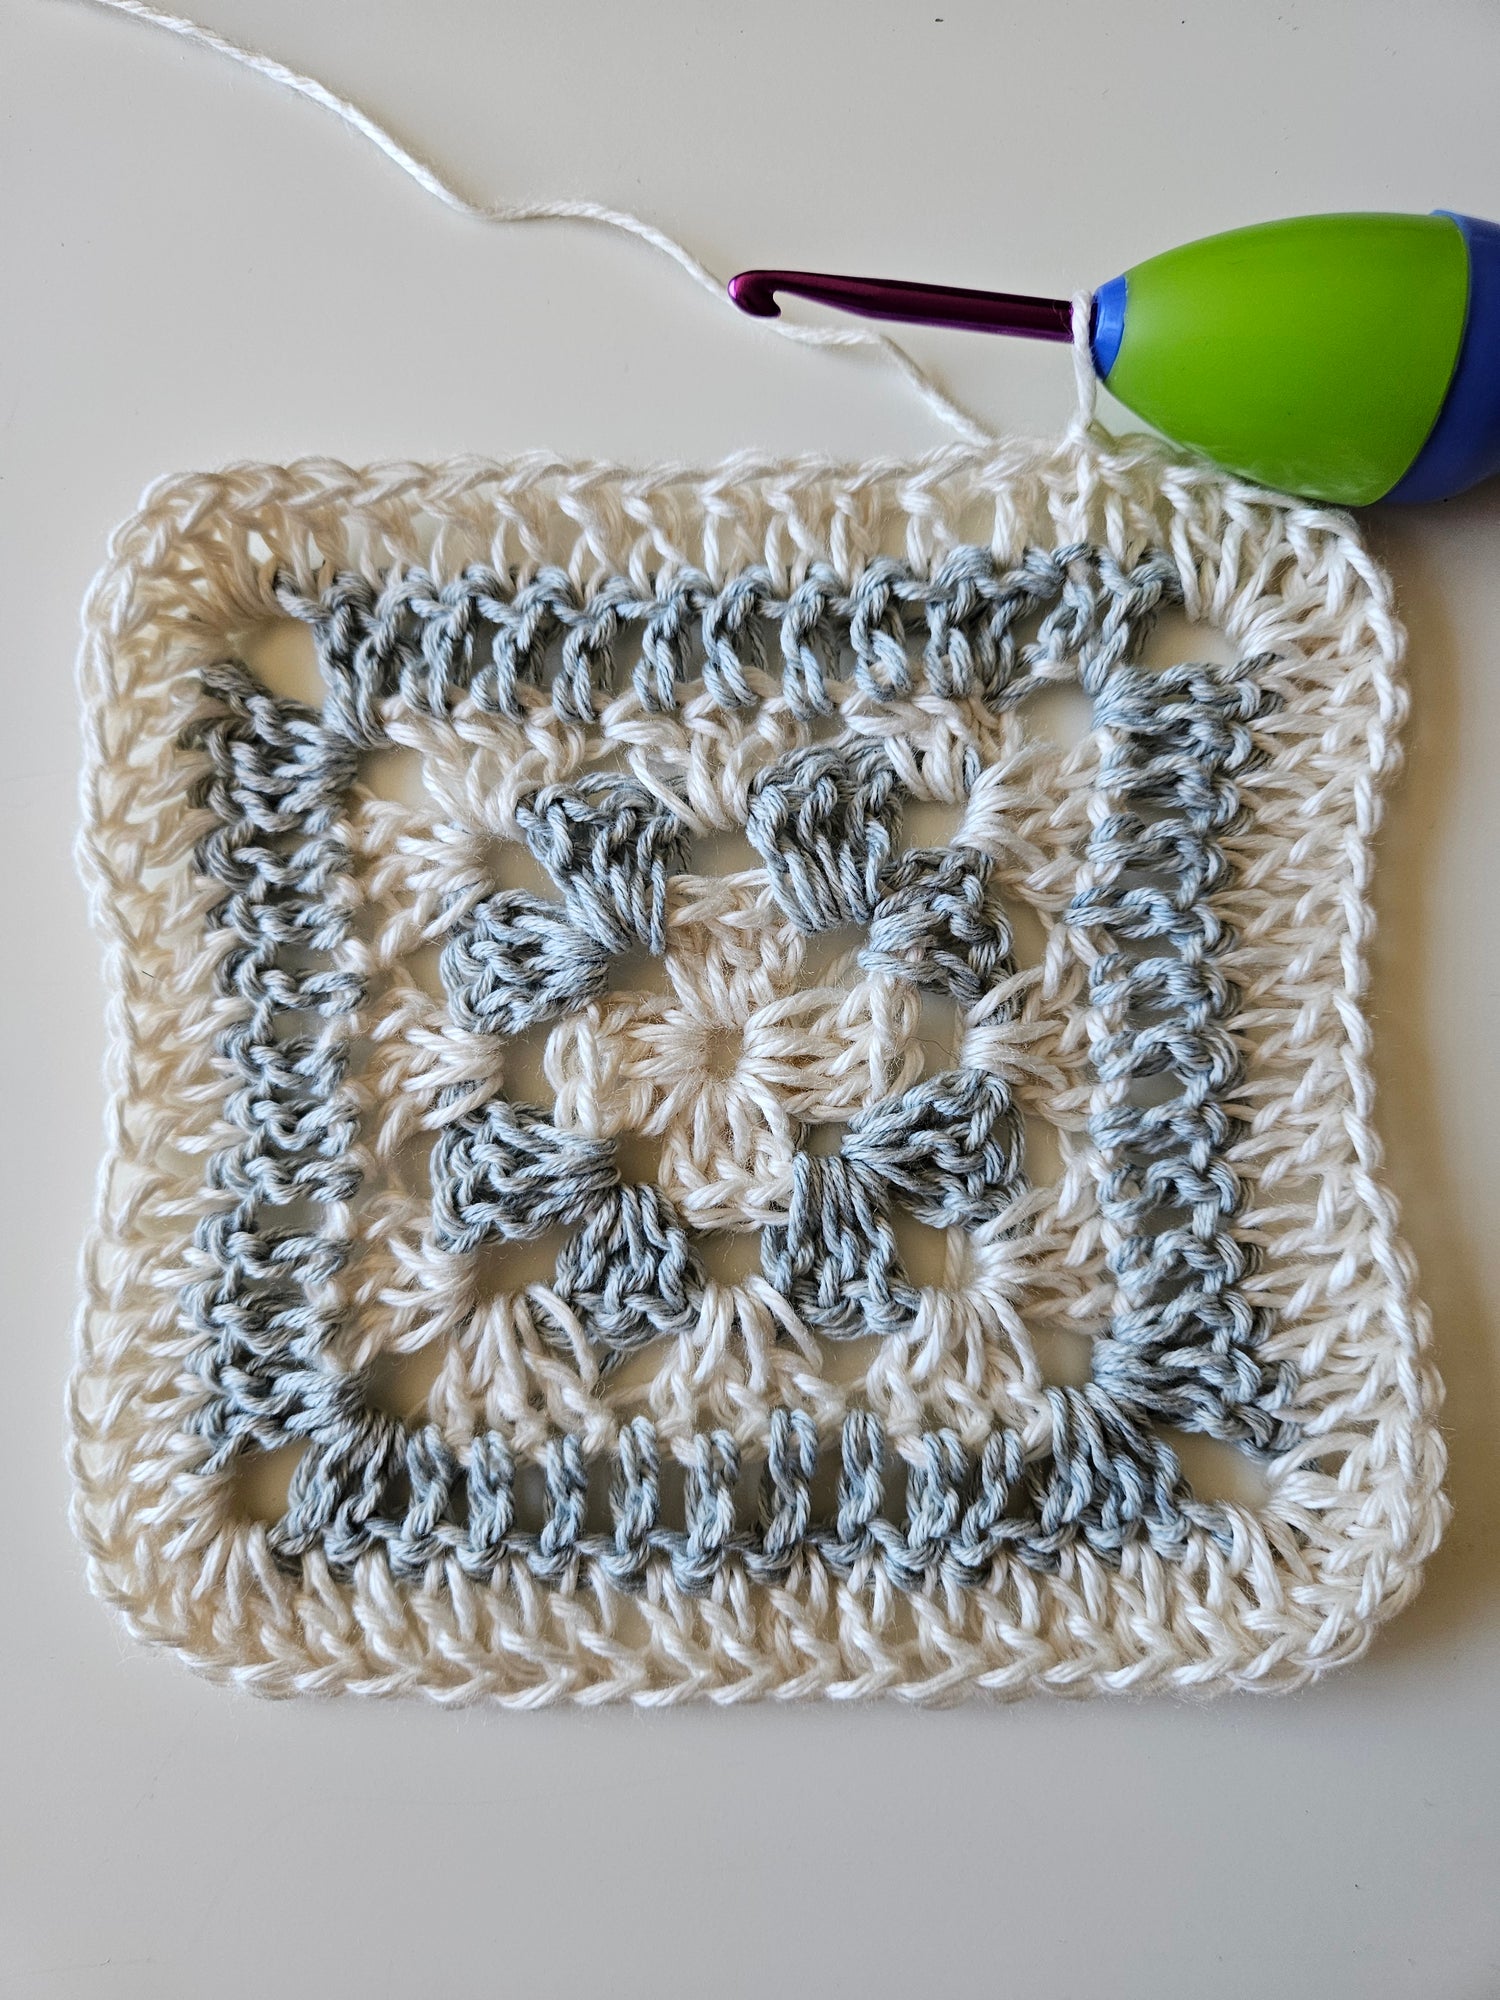
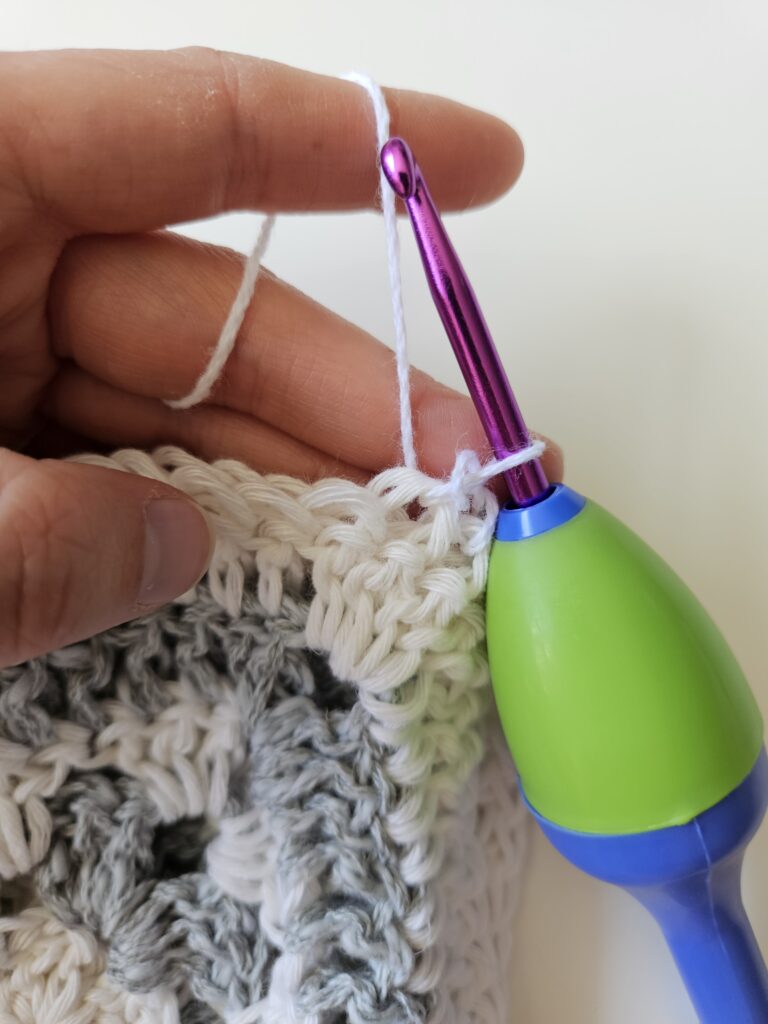
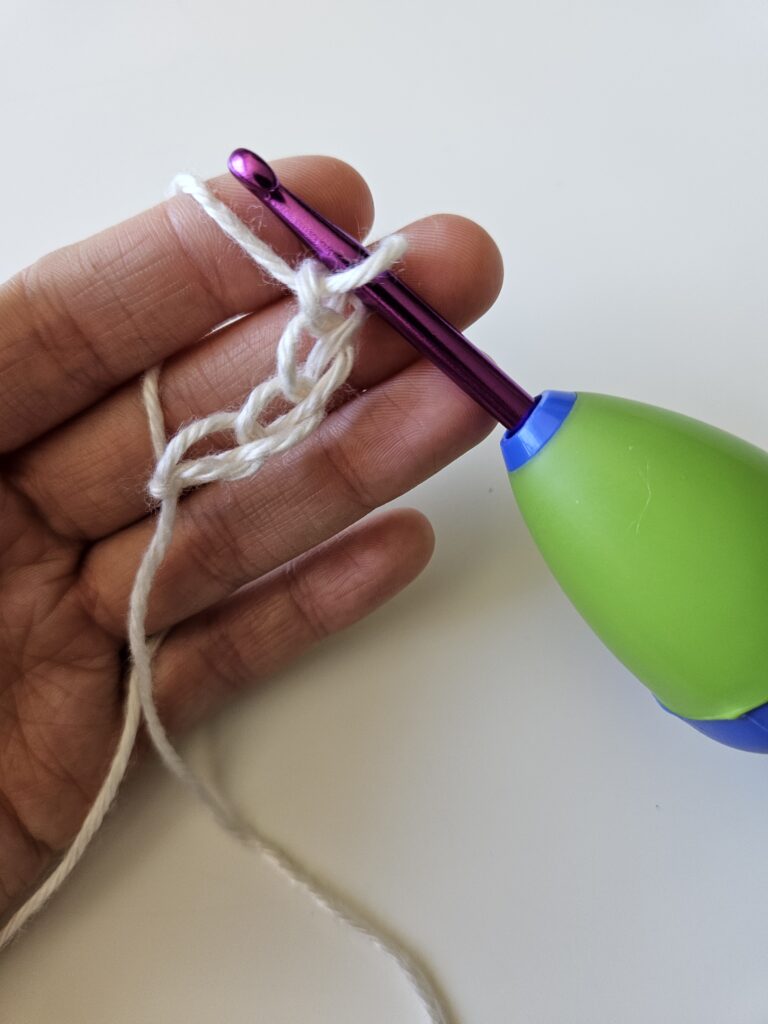
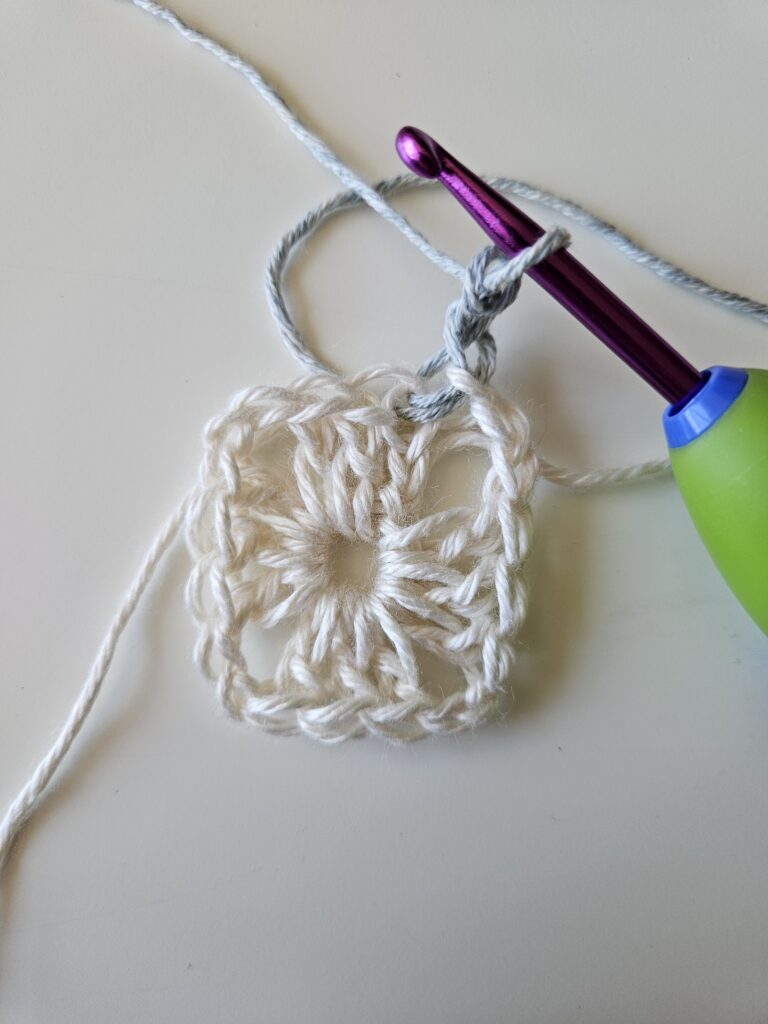
Step 1: Creating the first Granny Square
(the video has lots of tips and tricks on how to make your granny squares PERFECT, that are not included in the written instructions!)
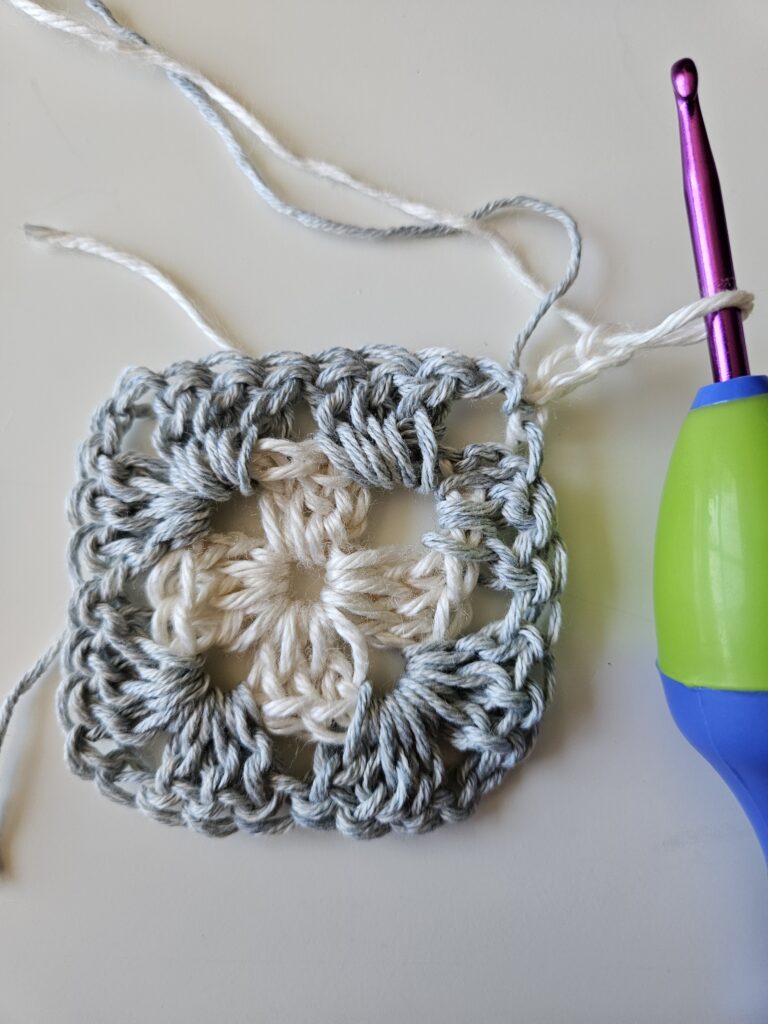
Row 1:
Ch 4, sl st into the 1st ch, ch 3
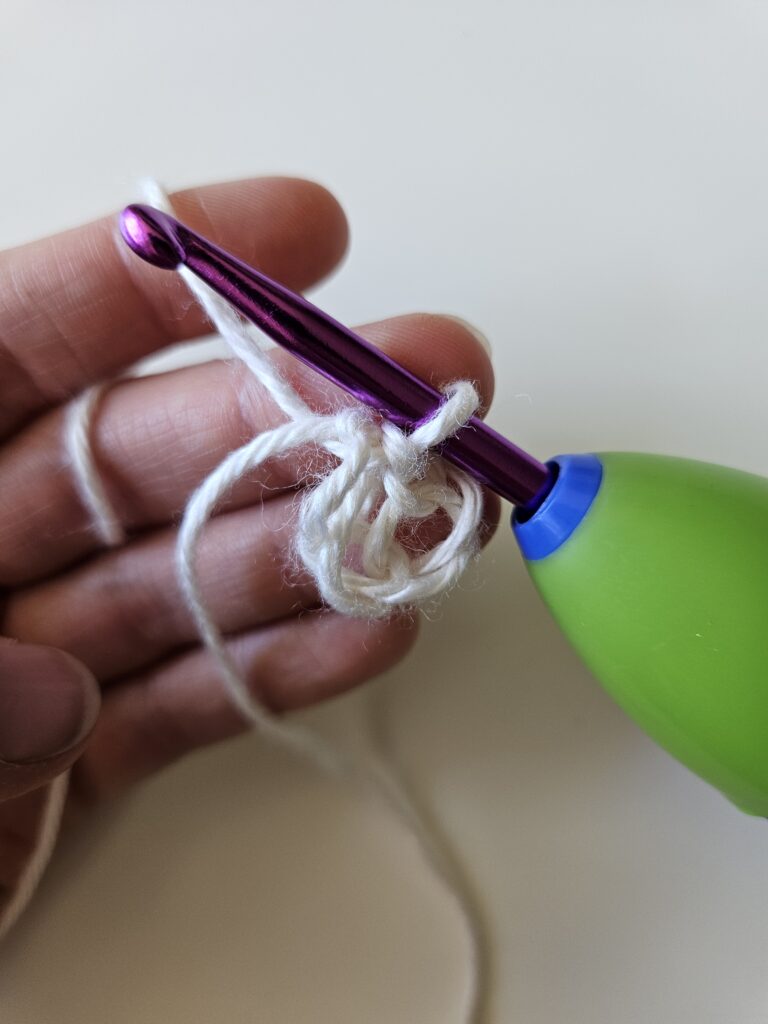
Row 2:
ch 3, then (working into the space between the 4 chains from last round) 2dc, ch 2, *3dc, ch 2,* repeat 3 times, insert hook into the 3rd ch from the start of rnd, yo new color, pt new color through all loops on hook, ch 3, turn
Row 3:
(Working into the current ch sp), 2dc, *sk the next cluster, work into the next ch sp (3dc, ch 2, 3dc),* repeat 2 more times, sk the next cluster, and into the next ch sp work 2dc, ch 2, insert hook into the 3rd ch from the start of the round, yo new color, pt new color through all loops on hook, ch 3, turn
Row 4:
(Working into the current ch sp) 2dc, *sk 3, work into the sp between the two clusters, 3dc, sk 3, then working into the (3dc, ch 2, 3dc)* repeat 2 more times, sk the next cluster, into the space between clusters 3dc, in the next ch sp 3dc, ch 2, insert hook into the 3rd ch from the start of the round, yo new color, pt new color through all loops on hook, ch 3,
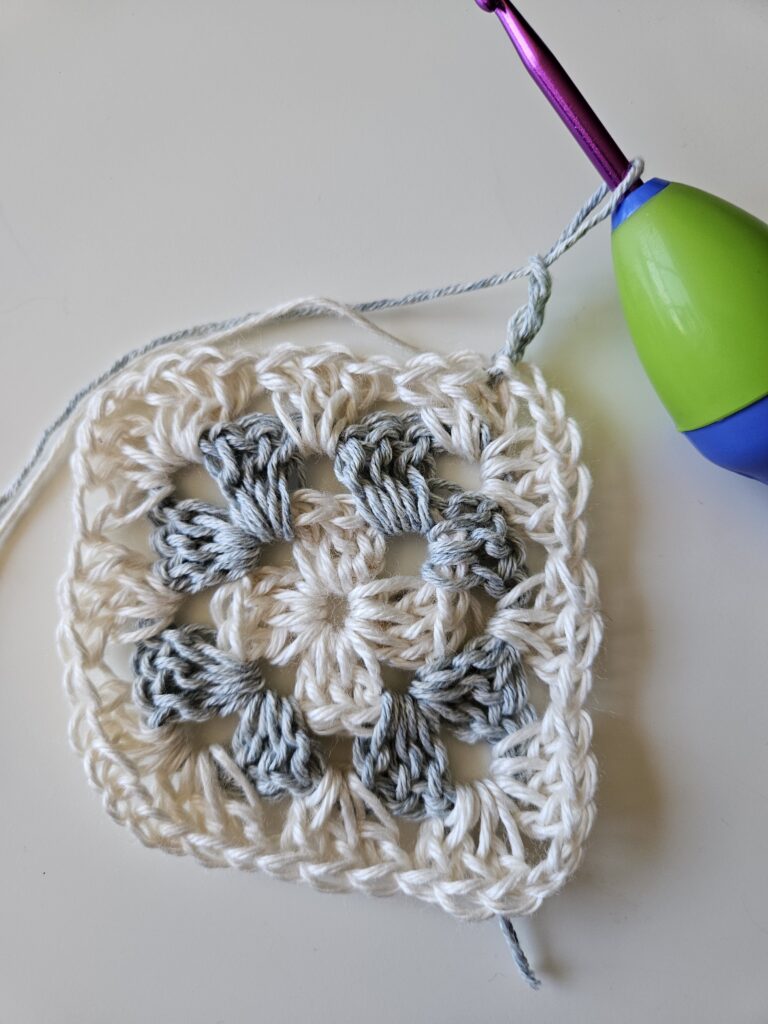
Row 5:
(Working into the current ch sp) (dc, ch 3, 2dc), * dc in each st (9 total) until the next ch sp , in the next ch sp (2dc, ch 3, 2dc)* repeat 2 more time, dc in each st until you reach the chains from the start of the round, insert hook into 3rd ch from the start of the round, yo new color, pt new color through all loops on hook, ch 3, turn
(make sure that each side has 9 dc stitches across - not counting any of the corners)
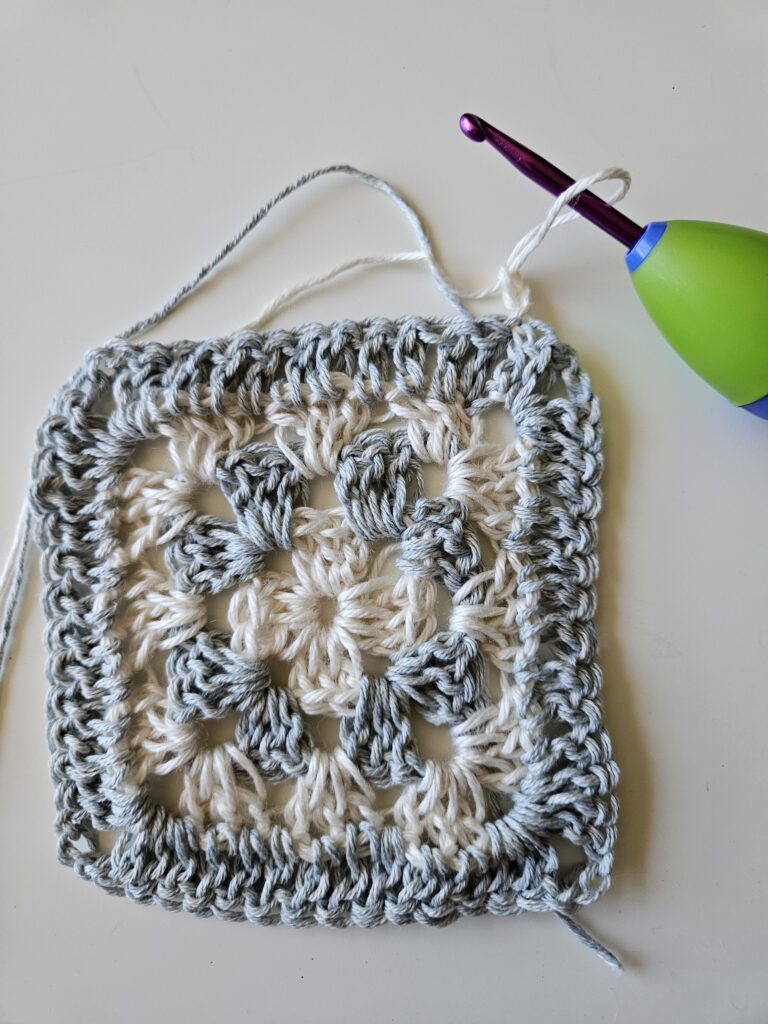
Row 6:
dc into the next 11 st, in the ch sp 5dc, *dc in the next 13 st, in next ch sp 5dc*, repeat 3 more times, then dc in each st until you reach the starting chains, sl st in the 3rd ch,
Cut yarn, fasten off
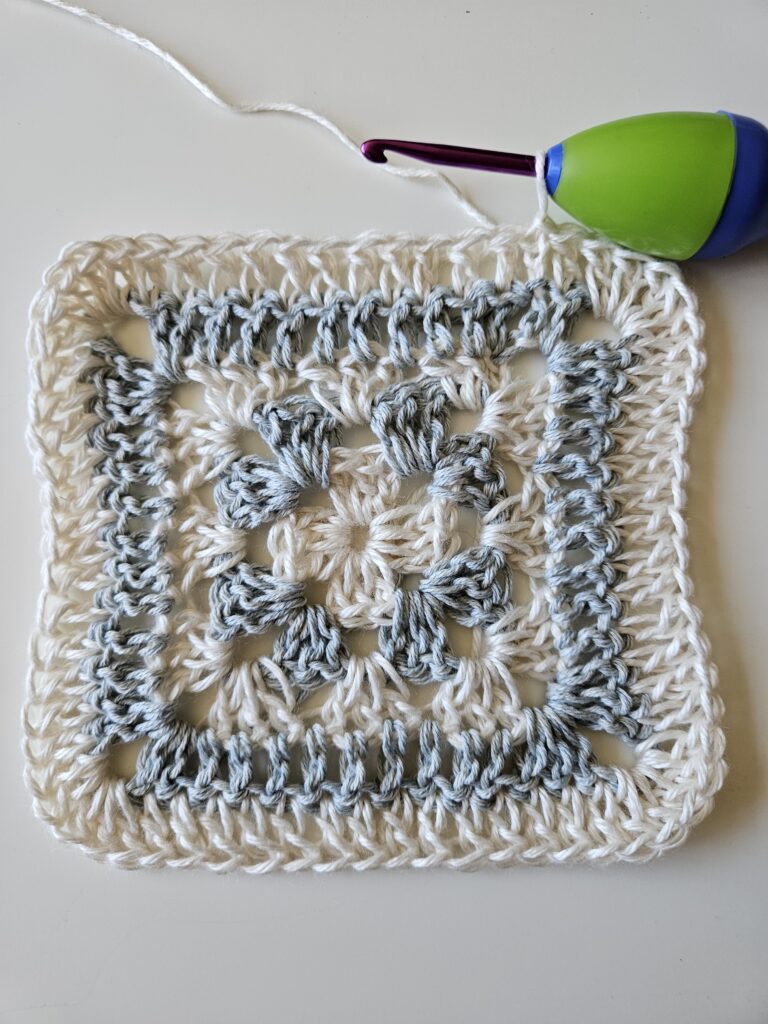
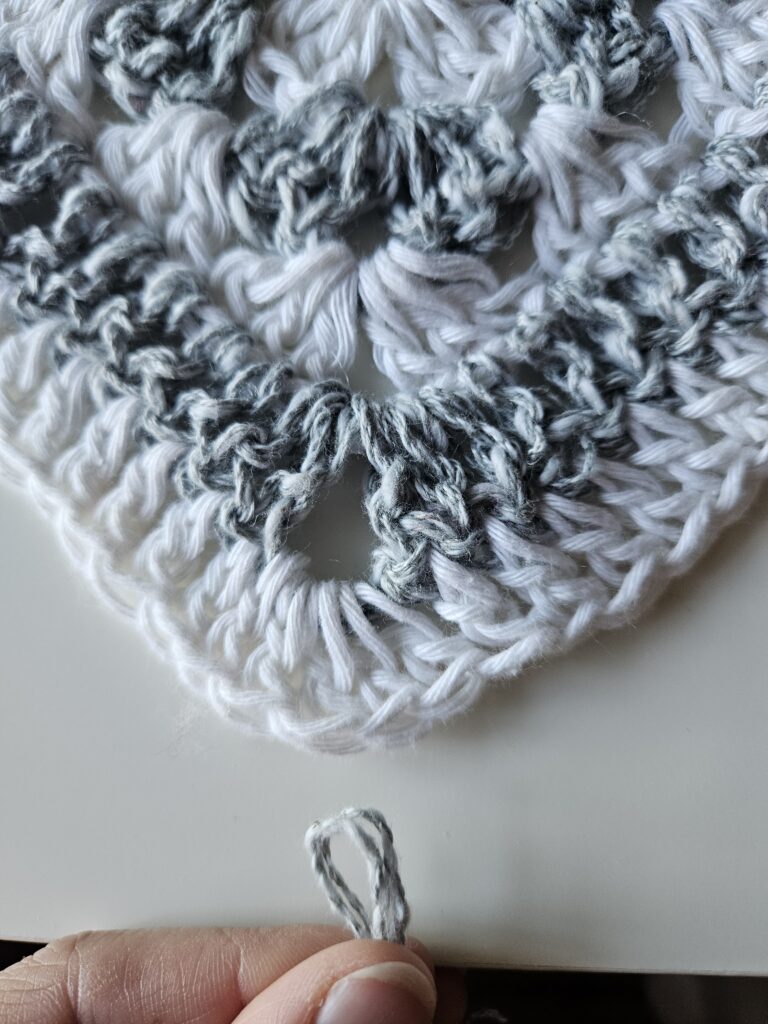
Congratulations!! Your first granny square is complete!!
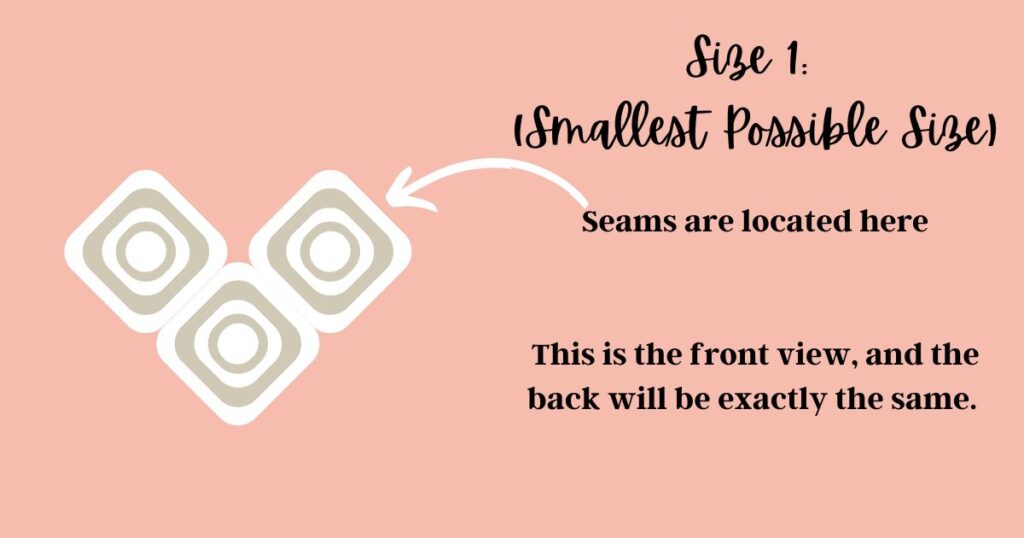
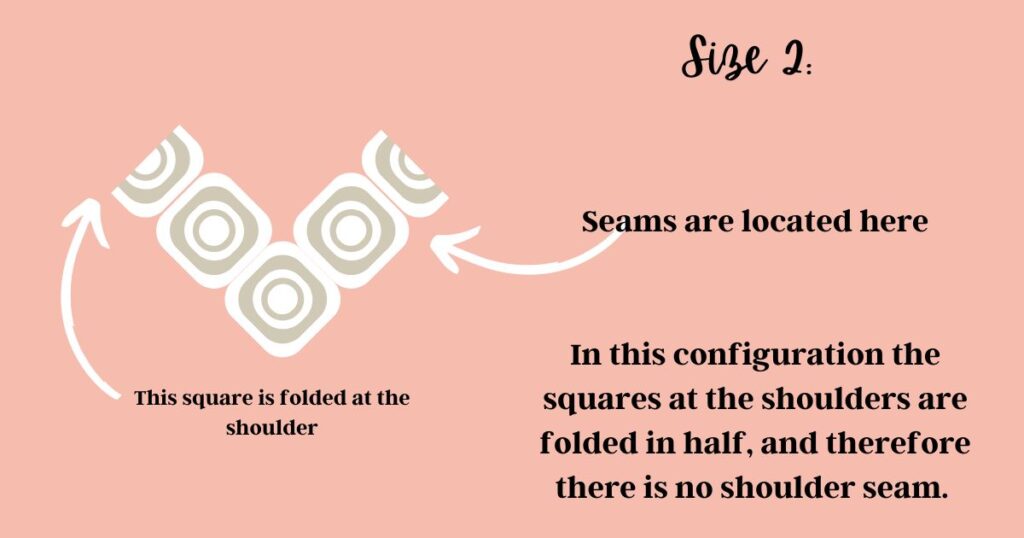
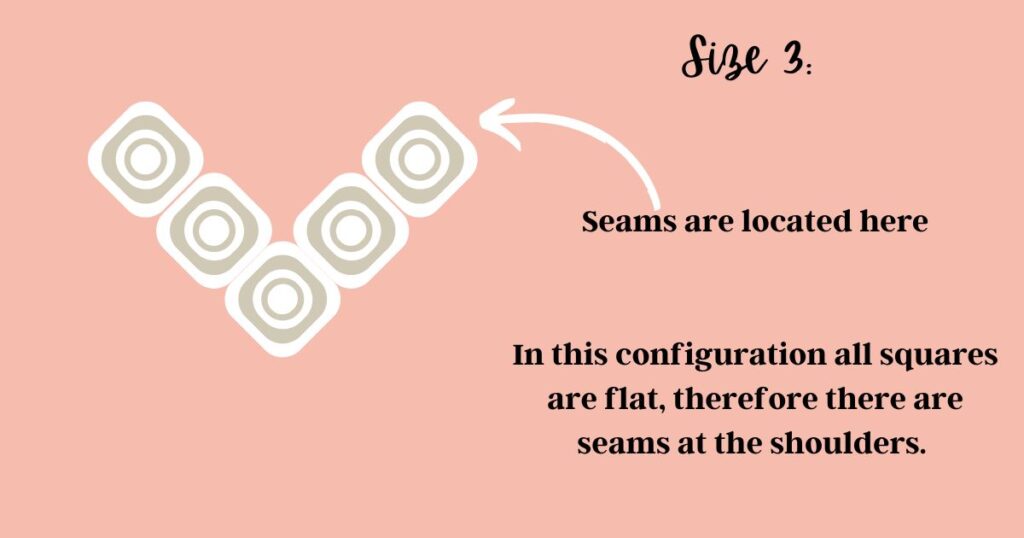
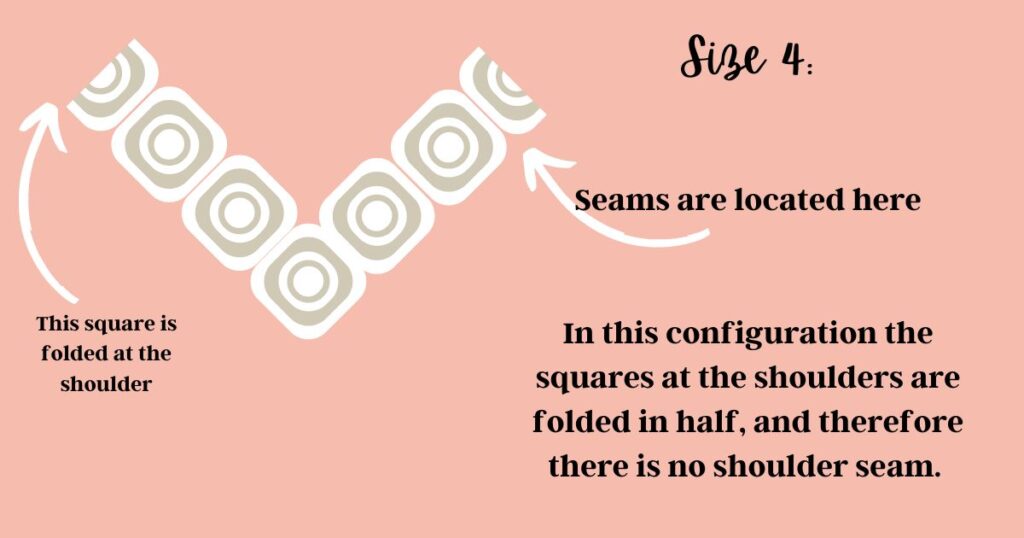
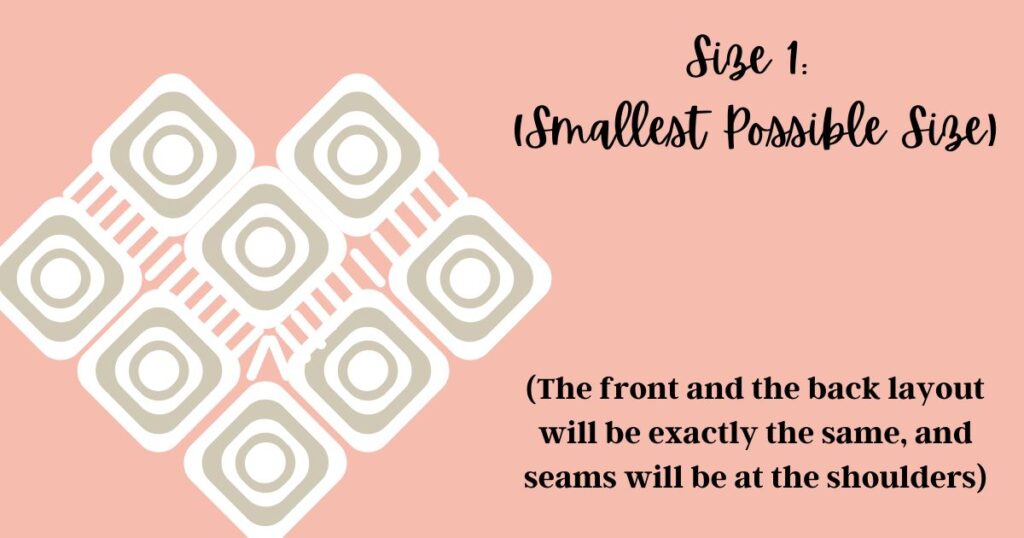
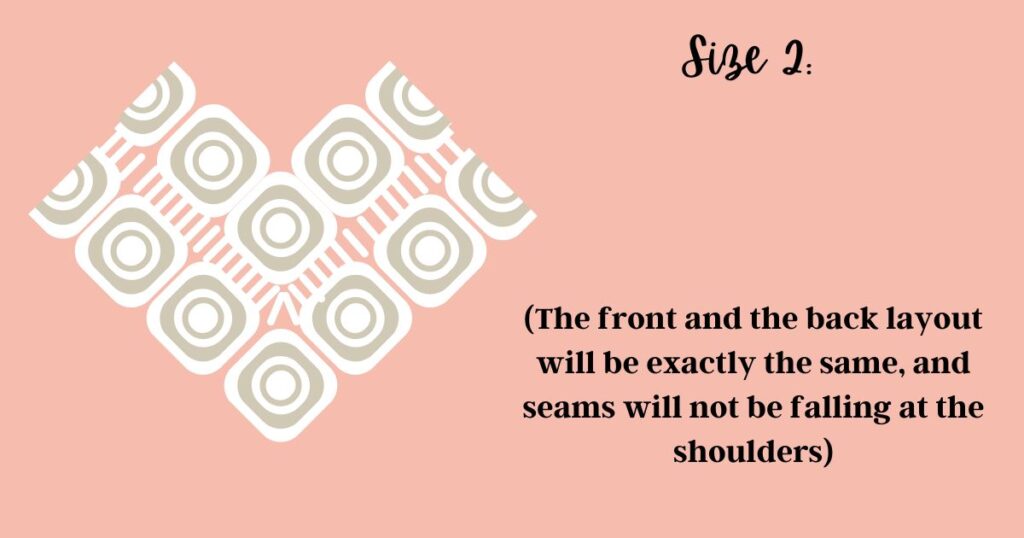
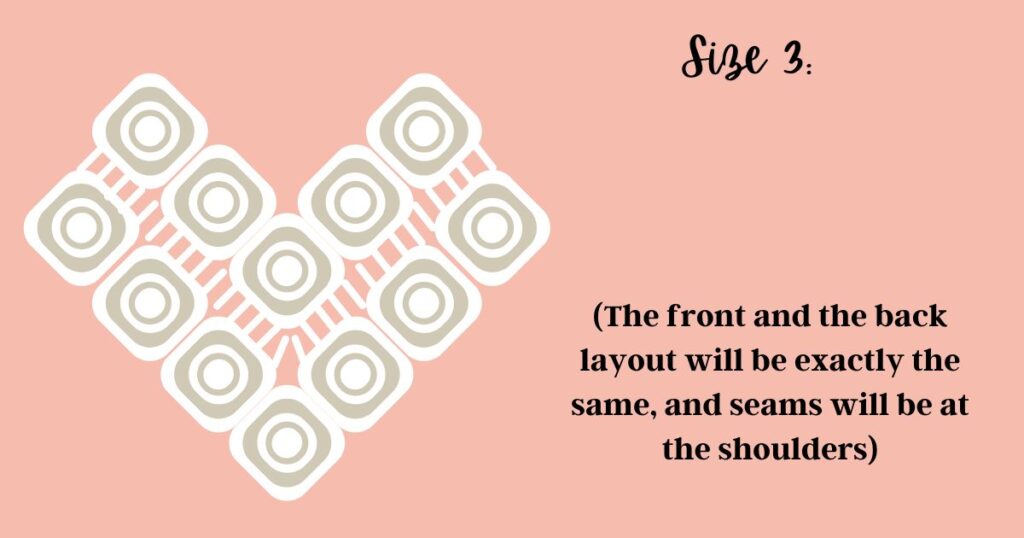
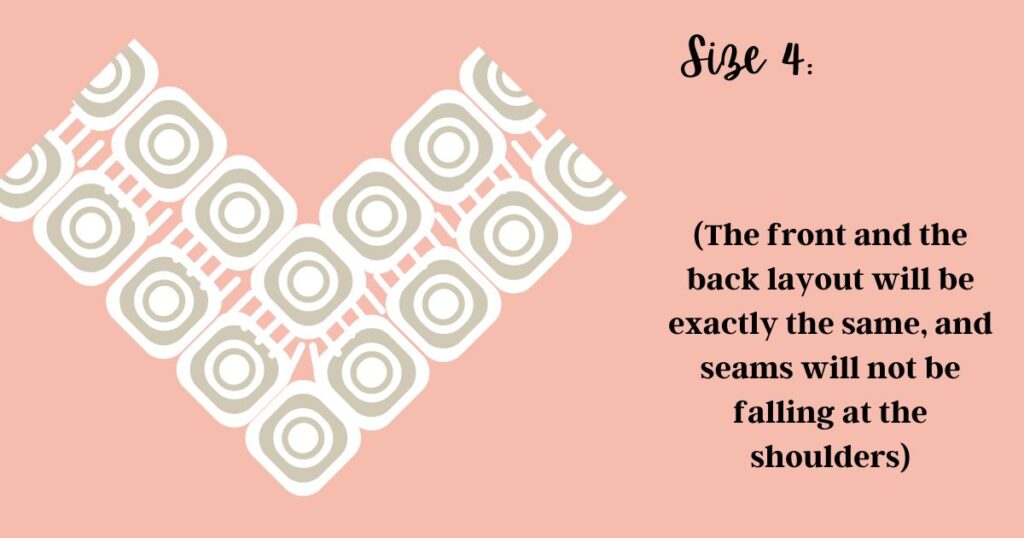
Figuring out how many Granny Squares you will need:
Depending on sizing, you will need to play around a bit with how many granny squares you're going to need.
Begin by creating 6 granny squares and placing them as follows, you can begin to figure out how many you'll need in total.
After laying out your squares like this, you can attach them temporarily with st markers, and try on the poncho... if it doesn't fit, you can go up a size (or how ever many needed) by creating two more squares, and then trying the next layout.
Once you have found a neckline layout that works - don't worry if the neckline is currently too wide (we will do neckline ribbing on it after), you can proceed with creating the rest of the necessary squares.
Here are the layouts for the FRONT only for each size (you can create bigger sizes too, by following the same pattern).
(Please note that this layout is only one side, and the number of required squares will be doubled.)
Assembly:
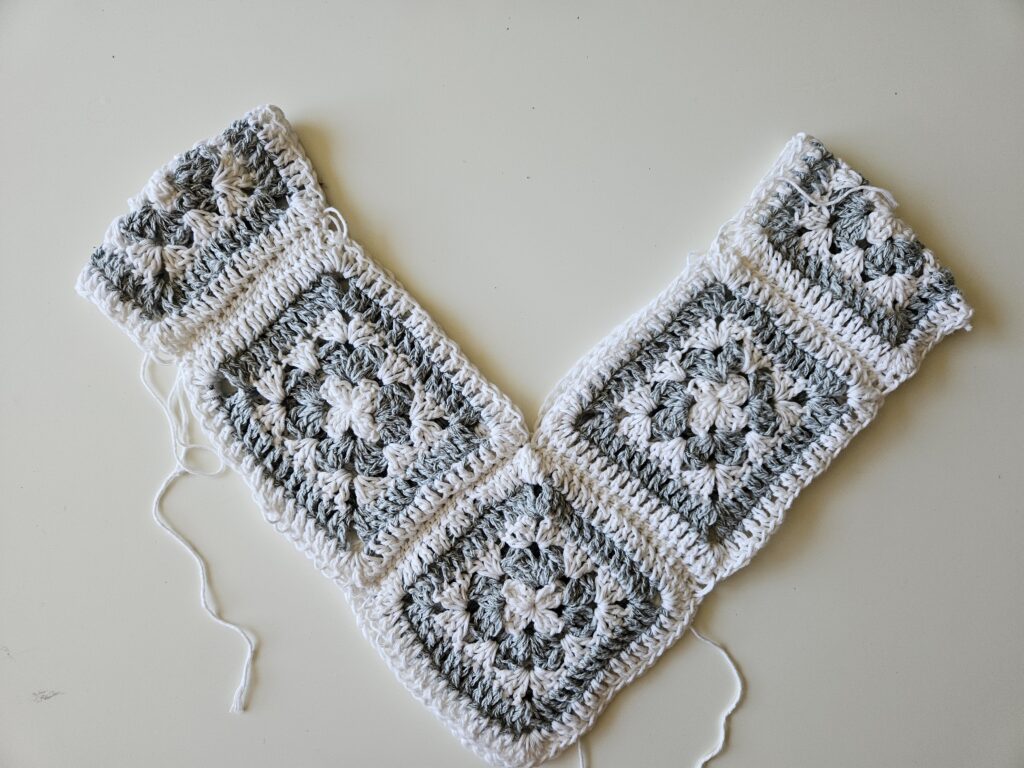
Once you have chosen your layout, and made enough squares to complete it, it's time to assemble your poncho!
Begin with creating the top row first (the neckline portion first).
To attach your granny squares together, you may use any method that you would like! If you would like some suggestions, please check out my video below for 3 methods that I love using!
Once you have attached the first row of your granny square poncho together, it should look something like this:
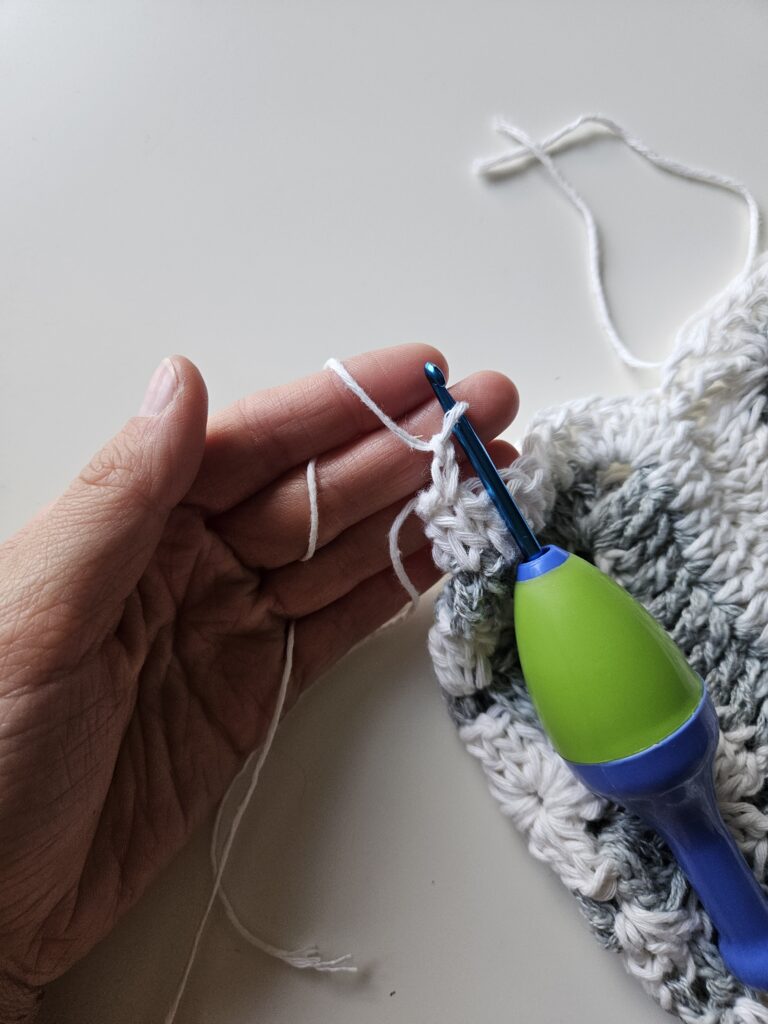
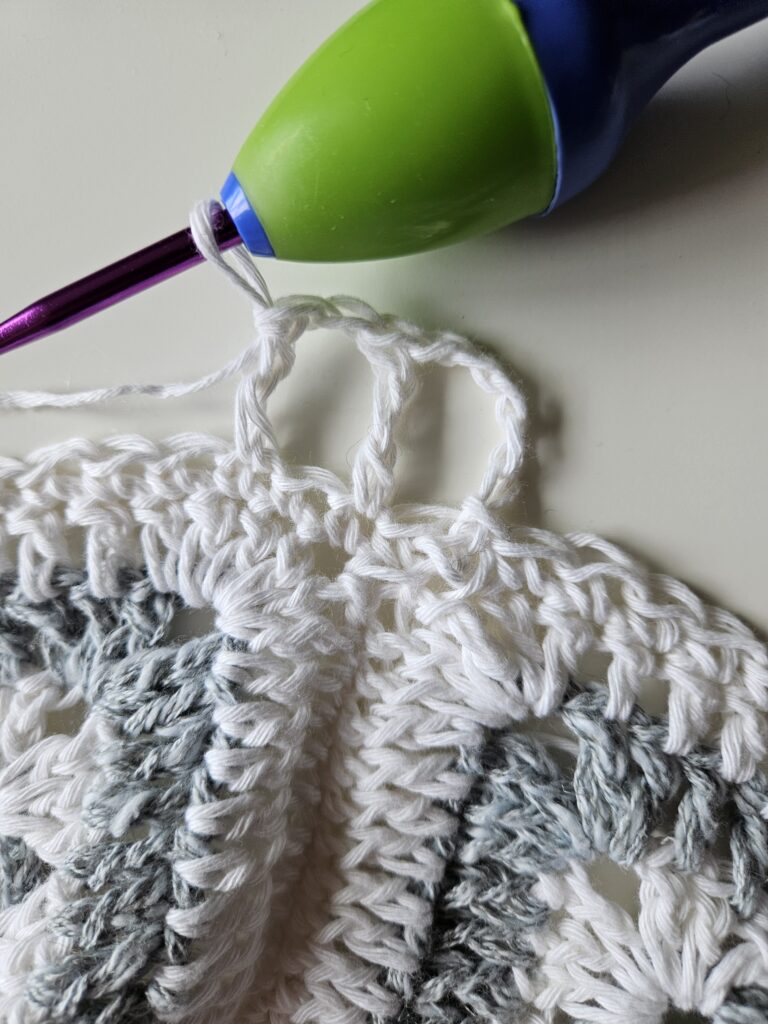
Neckline Ribbing:
To create the neckline ribbing, insert your hook into one of the seams right at the corner where you have joined three granny squares, and ch how ever many stitches you'd like for the length of your ribbing (if your neckline is super wide, you would need to ch more).
Row 1:
Once you have inserted your hook into the seam at the corner where there are three granny squares, ch 5 (you can do more), turn
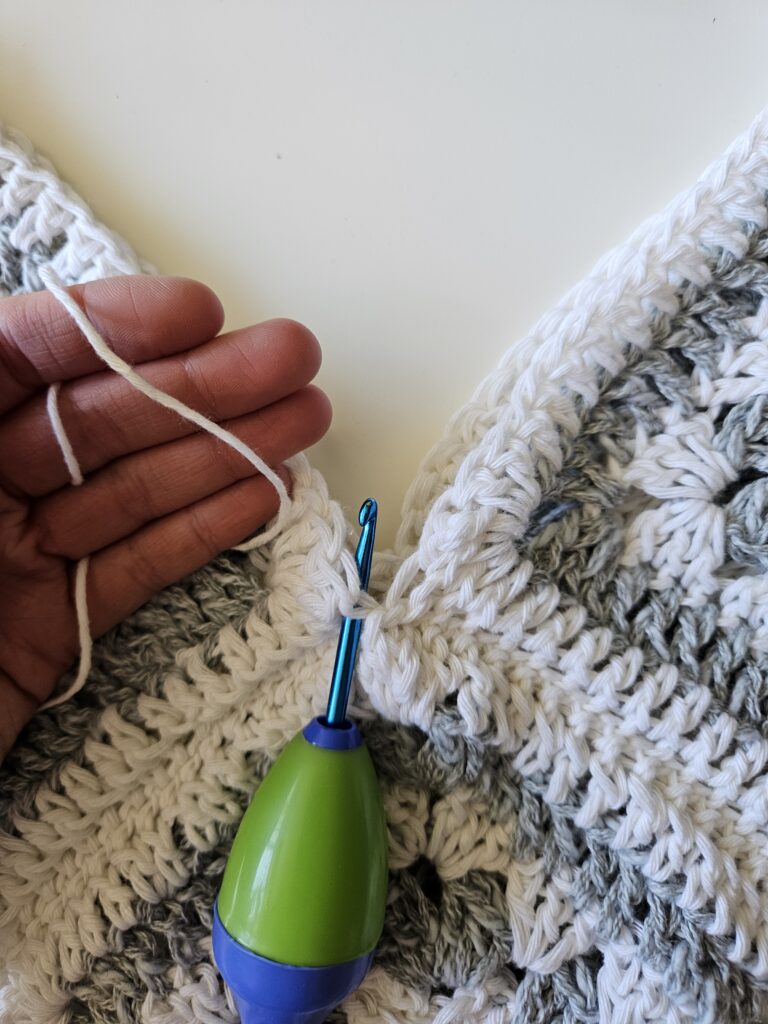

Row 2:
in 2nd ch from hook, sc, sc across until you reach the garment, sl st into the next two st on the actual garment, turn
Row 3:
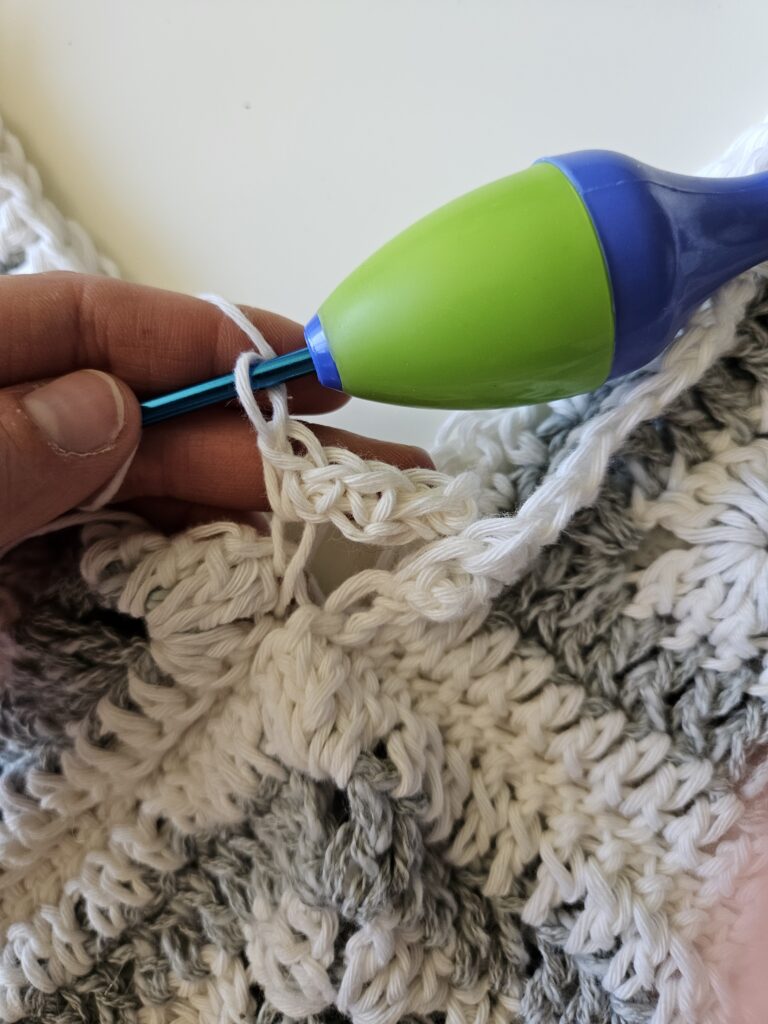
sk the 2 sl stitches from last row, working into the next sc on the ribbing, sc blo across, ch 1, turn
Row 4:
skipping the st where the last ch falls, sc blo across until you reach the actual garment, sl st 2, turn
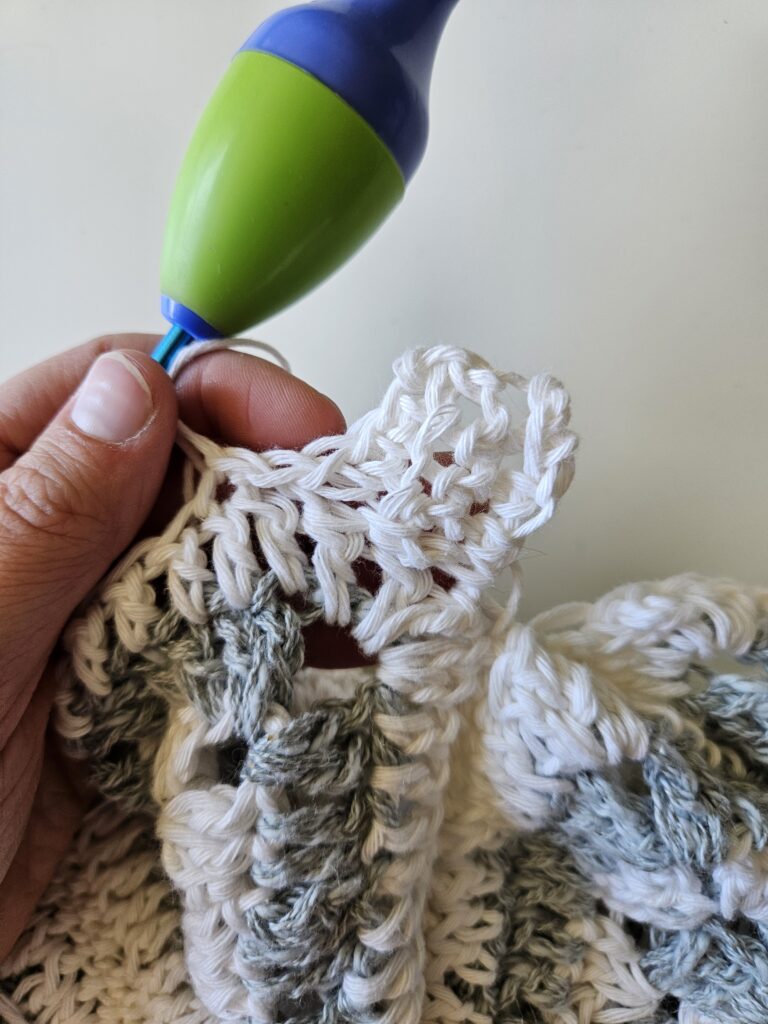

Repeat rows 3 & 4 until you have gone all the way around to the second corner where there are three granny squares joined, then cut yarn.
Start again by inserting your hook into the corner again and proceeding around to create the second half of the ribbing. (There should be a break in the ribbing at this spot).


If you are struggling with creating neckline ribbing, please watch the following video to help you :)
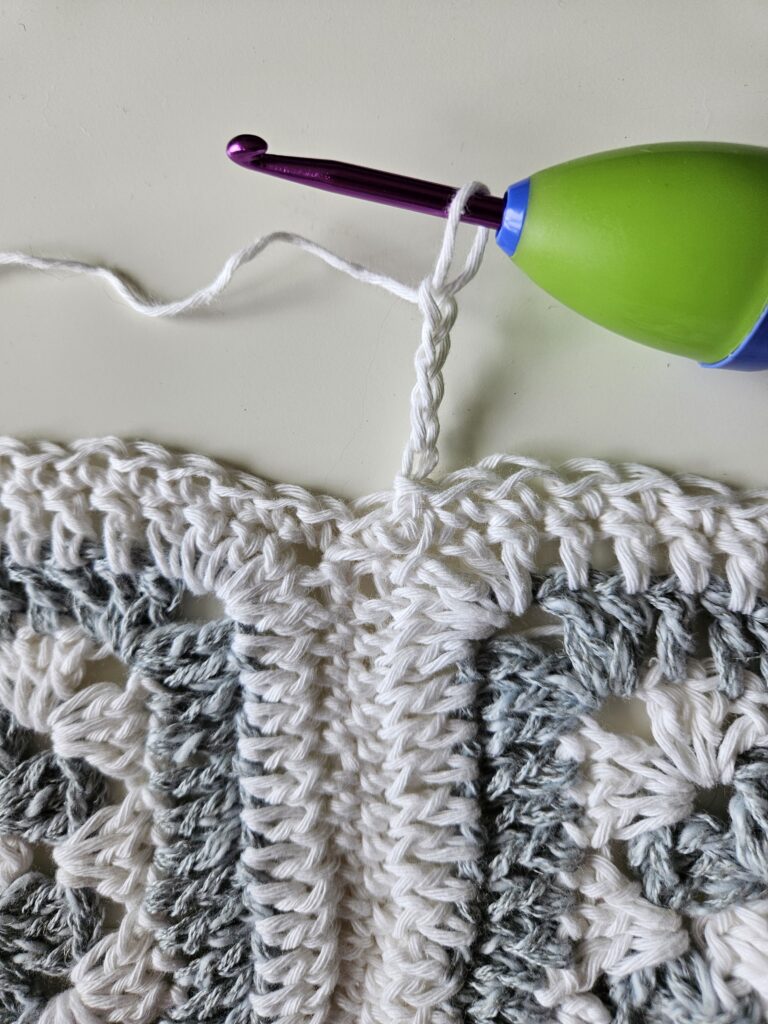
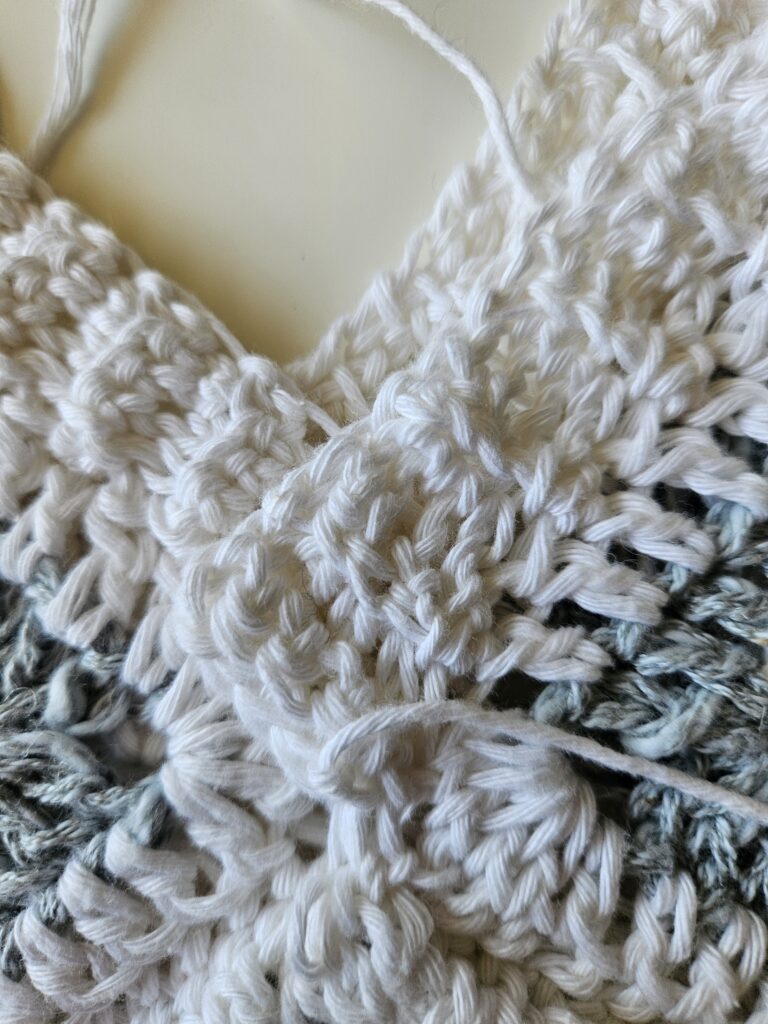
Middle Rows:
Now that your top portion of the poncho is completed, we are going to work on the rows in between the two sections of granny squares.
Row 1:
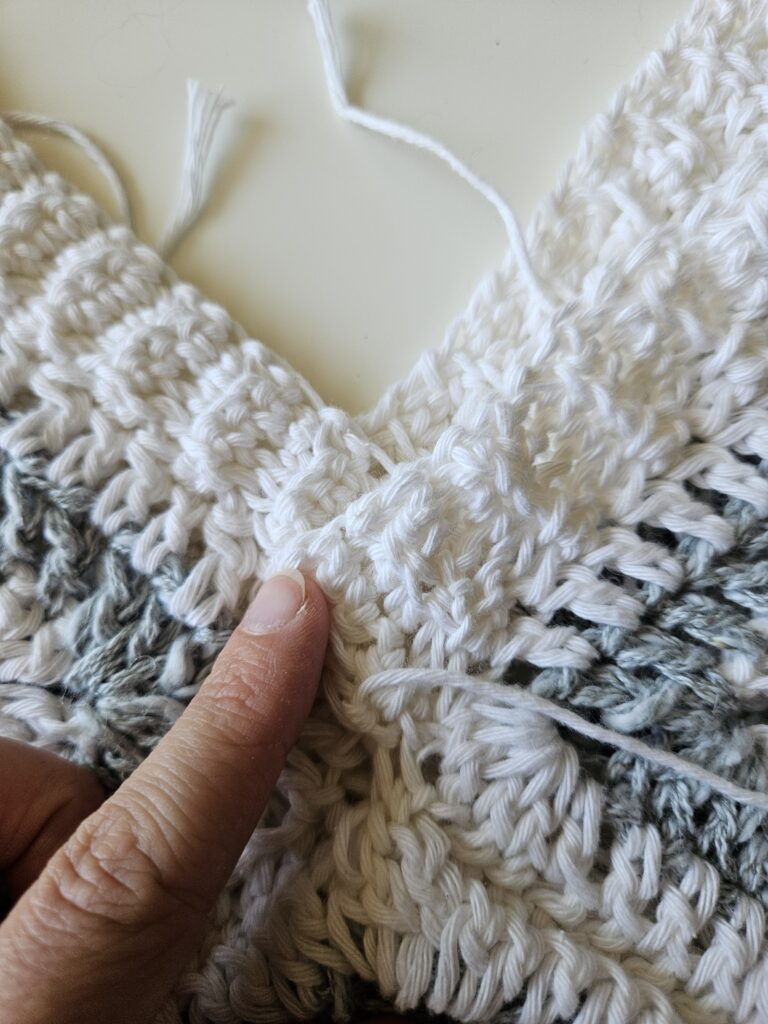
Insert your hook into one of the seams where granny squares are attached to each other, then ch 2, and sc across the entire length of the garment. sl st into the 2nd ch when you have made your way back to the start of the row.

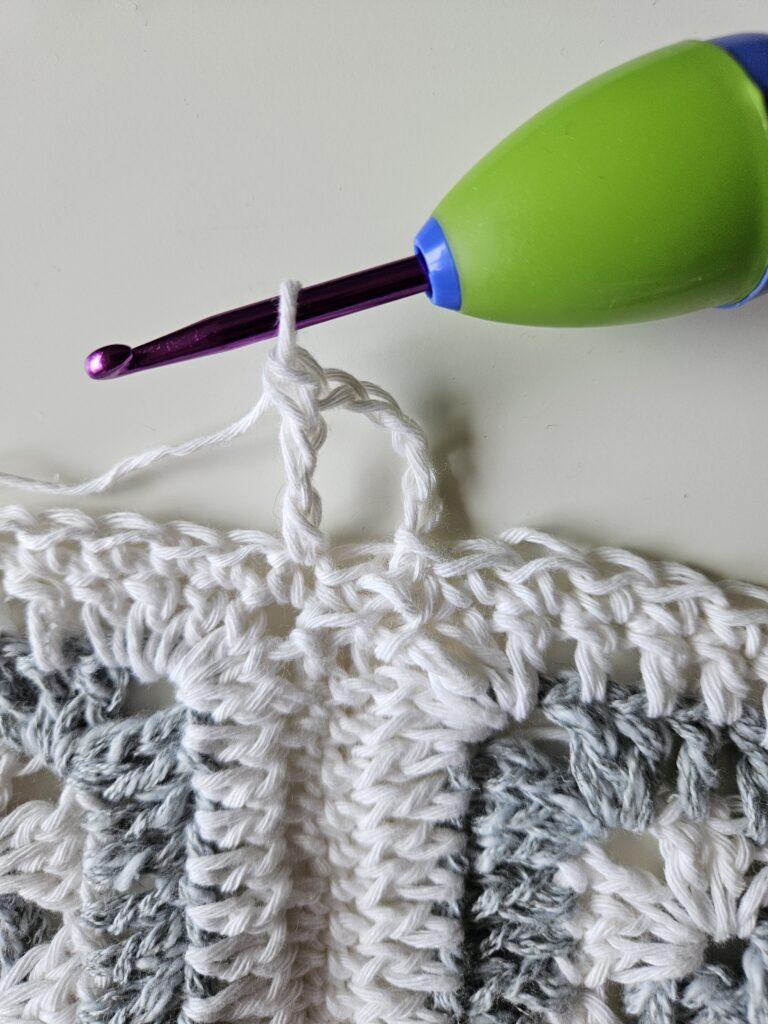
Row 2:
Ch 5, sk 1, tr in the next st, * ch1, sk 1, tr in the next st* repeat all the way around the garment, then sl st into the 4th ch from the start, ch 2, turn
(If you would like to have a wider row of holes as this step, you can swap out the tr for a dtr)
Row 3:
sc in each st and ch across the entire garment, then sl st into the 2nd ch from the start, cut yarn fasten off
The Rest of the Assembly:
Now that all of your squares are completed, and all of your in-between rows are also completed, it's time to stitch together the lower row of granny squares (following the same exact method as above).
Once your row of granny squares is completed, attach the row onto the last row of single crochets that we completed previously.

When attaching the granny square row to the rest of the garment, make sure that your granny squares line up exactly with the granny squares above them - sometimes to make this happen you may need to work from the same stitch to two different stitches on the other panel (whatever it takes to make sure that they all line up haha!).
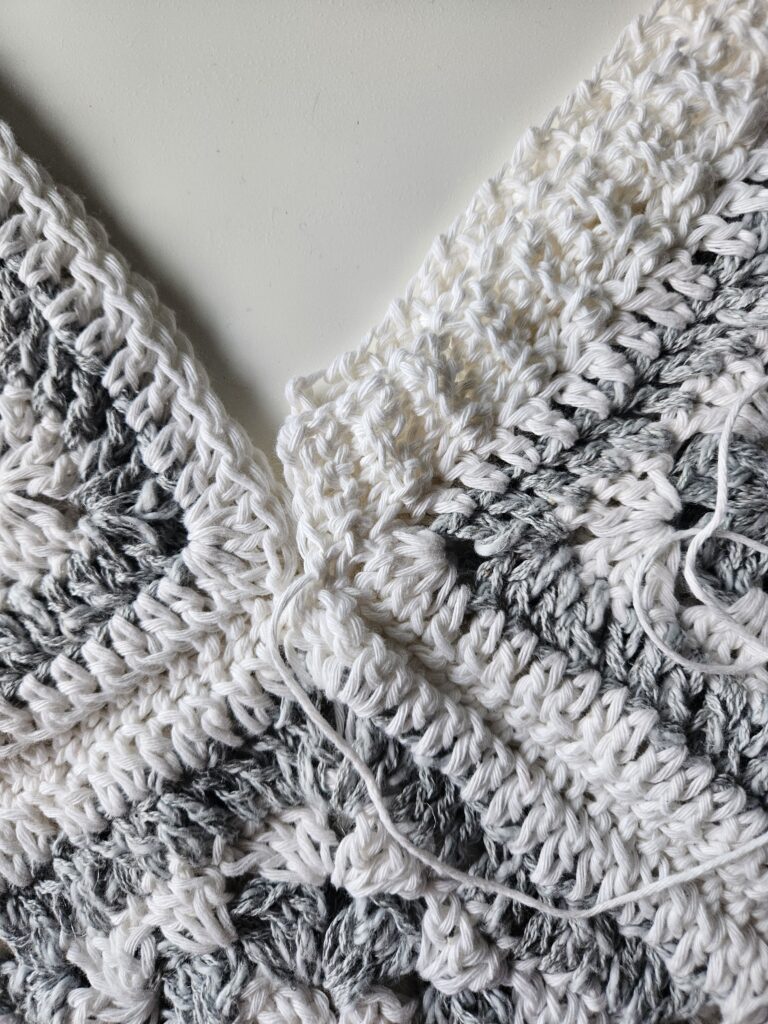
Once this is complete, there is only one more step to the assembly - attaching the neckline ribbing together. Overlap one piece of ribbing onto the other piece of ribbing, and using either the ends that are left over there, or a brand new strand of yarn, sew the two pieces of ribbing together (overlapping) on both the front and the back of the panel. This should create a nice clean v-neck corner.

Once you have assembled the piece its time to weave in all the ends :)
Fringe:
Now that all ends are woven in, and the piece is completely assembled, it's time for the fringe!!
I used two strands of yarn per stitch, and cut a ton of pieces first, and then worked to lace them through (picking from the pile haha).


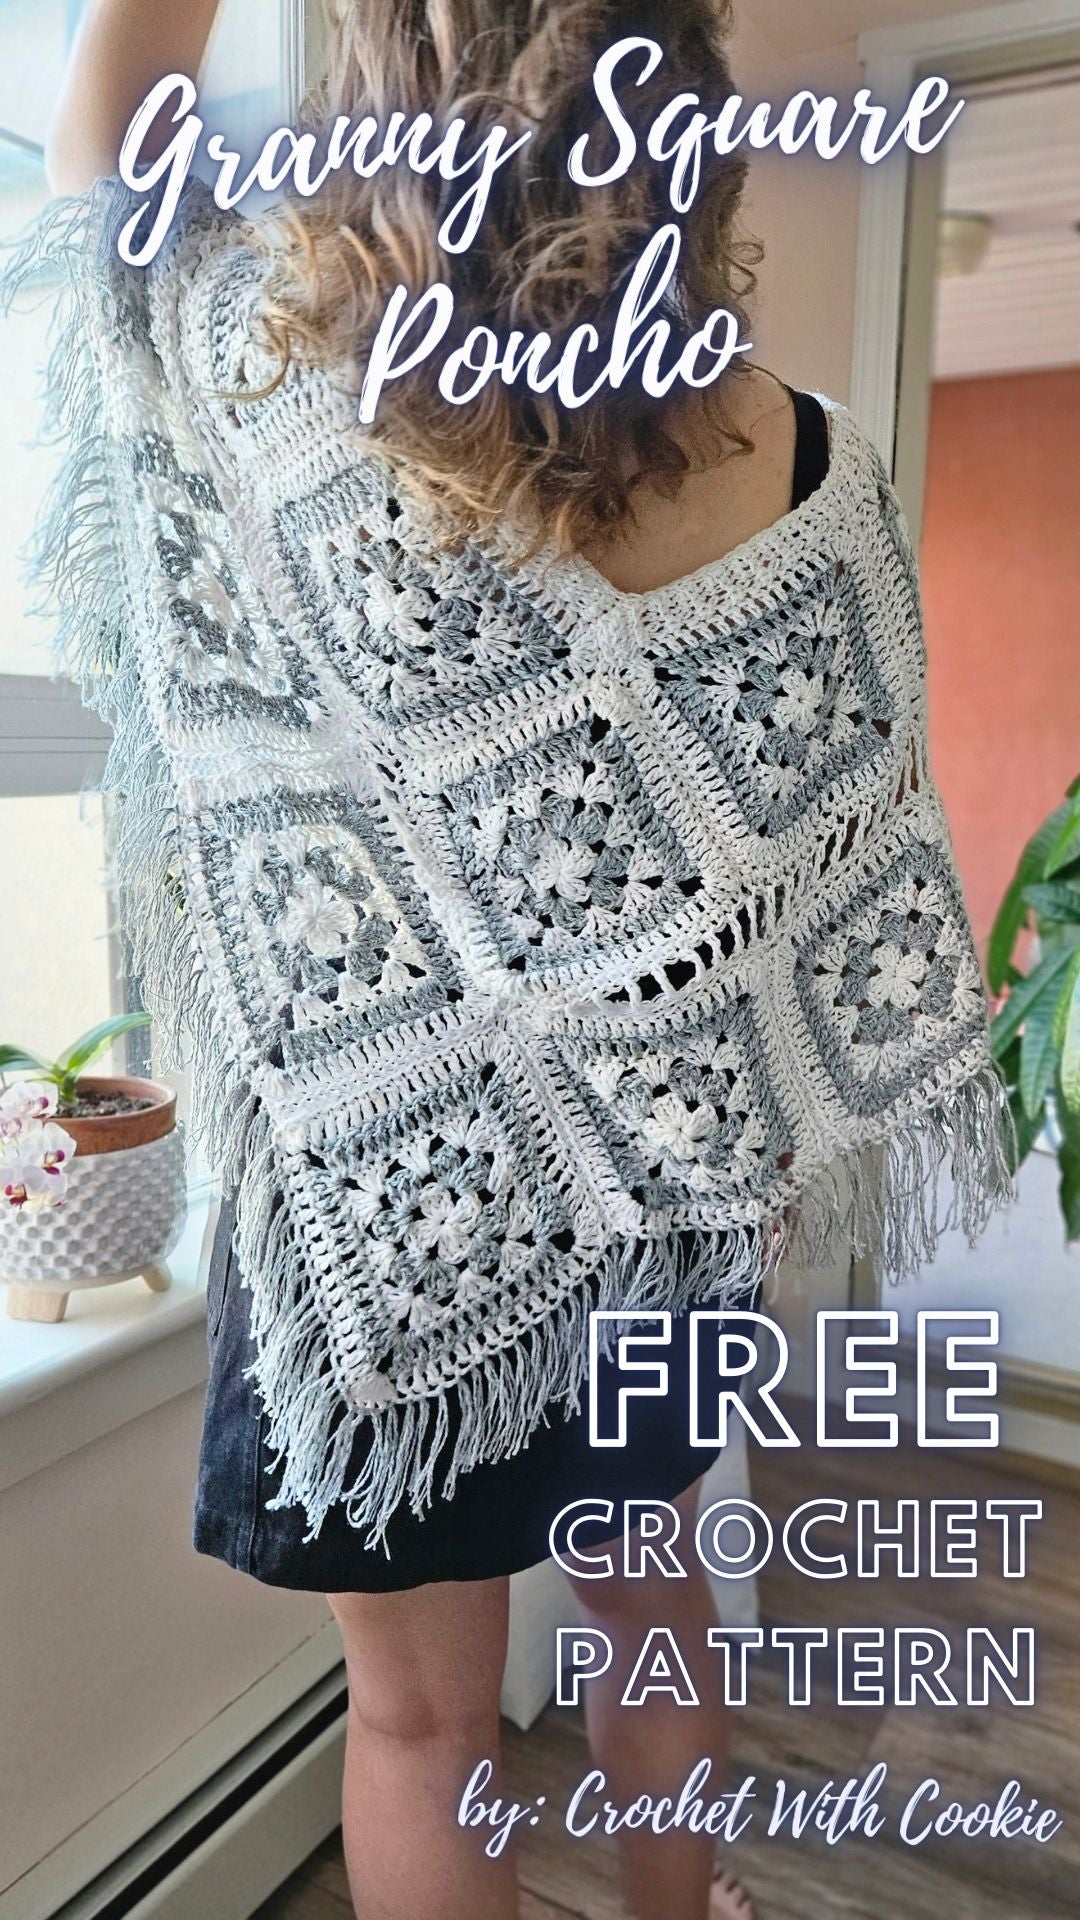
Once the fringe is completed all the way around, and you have woven in all ends, your Granny Square Poncho is complete !
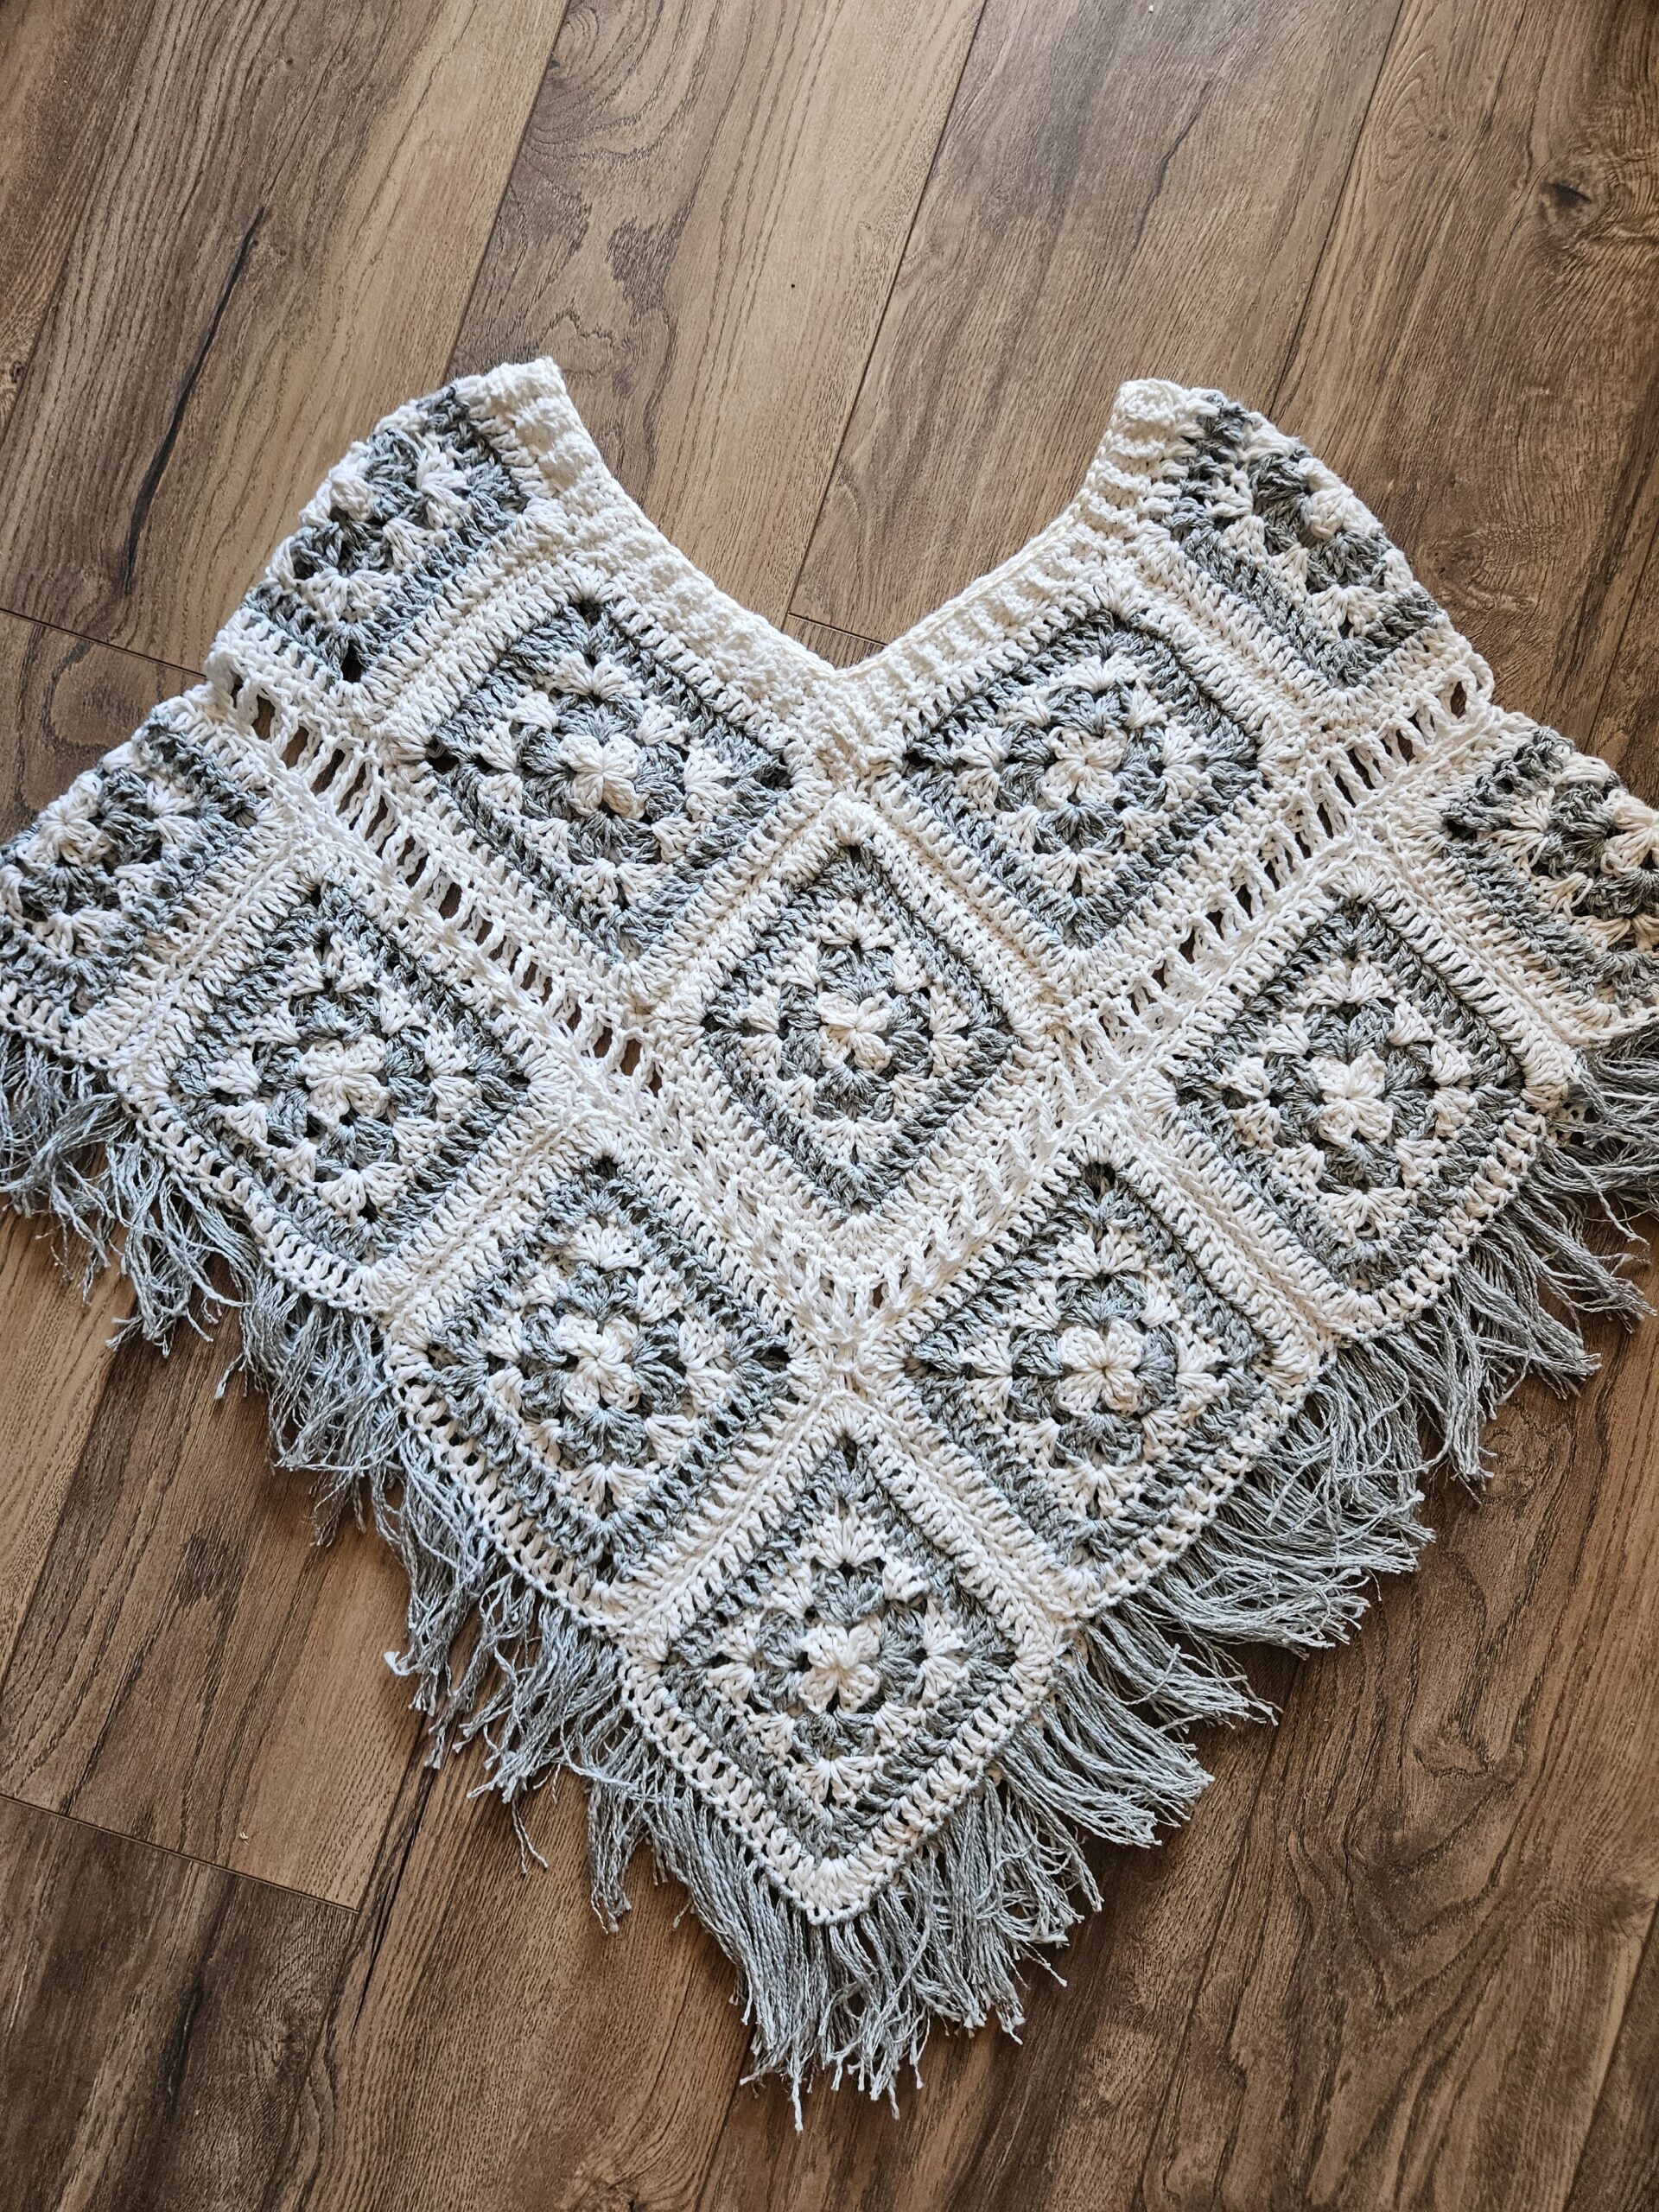
Congratulations on finishing your Granny Square Poncho :)
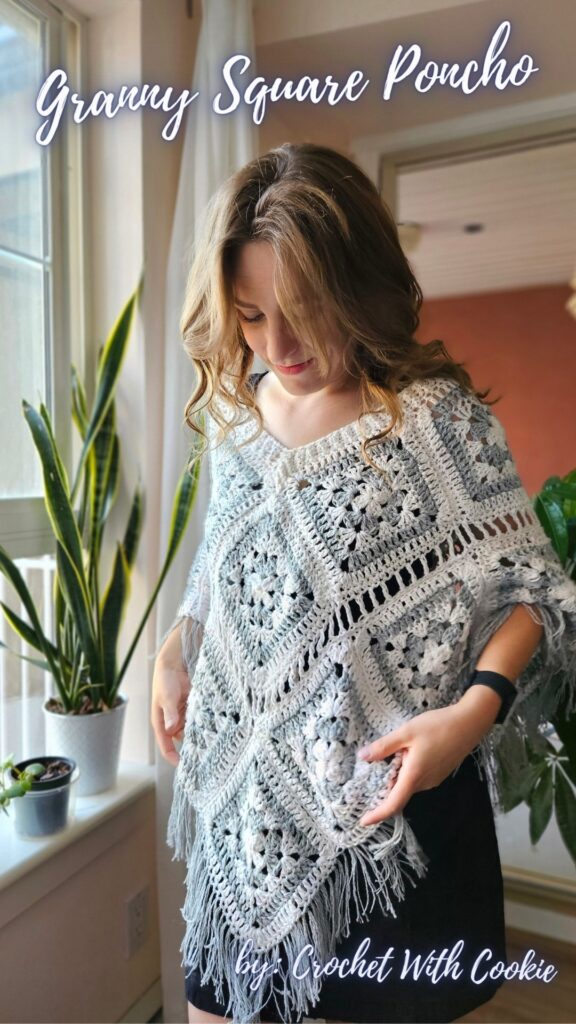
If you have enjoyed this free crochet pattern, please comment below to let me know, and share it with your friends! Follow along on my instagram @crochet.with.cookie to be notified of any and all new patterns that I release :)

2 comments
Love all your patterns
I’d love to make this