Chunky Beanie - Free Crochet Pattern

Created by: Crochet With Cookie

I am so excited to share with you this chunky crochet hat pattern! The pattern for this hat works up quickly and will surely make an excellent addition to your winter accessories. This is an easy crochet pattern, that uses a couple of different stitches, and can be worked up within 60- 90 minutes!

I'm sure that as soon as you make a hat, you'll find yourself wanting one in every color!

Please note this is a made-to measure pattern, and will fit any head size (from babies to adults).

Copyright Information

Please note that this pattern is created by, and is property of Crochet With Cookie and Crochet with Cookie reserves all rights to this pattern. This pattern cannot be resold, shared, reposted, saved to a shared google drive, modified or distributed in any other way or form with anyone else. No video tutorials can be made using this pattern, or for this pattern.

This pattern is for personal use only.

Please give credit to the pattern designer when posting, or sharing or selling products created using this pattern.

Disclosure: This post contains affiliate links. If you purchase through these links, Cookie and I may earn a small commission at no extra cost to you. Thank you for your support!

Choosing Yarn for this Project:

I recommend using a wool mix yarn for this crochet pattern, or pure wool yarn - because it will not only create a stylish toque, but also a really cozy and warm one (which is really important if you live in a really cold climate like myself!).

I am using a super bulky (6) yarn created by Lion Brand Yarns. My favorite is the Wool Ease yarn which is a 20% wool, 80% acrylic mix - and they have it in the most gorgeous color combinations. I'm a huge fan of red, but I've made this hat in tons of the other colors as well!

Another yarn that I have used for this beanie before is Loops & Threads - Cozy Wool, which is 50% wool and 50% acrylic, which ended up being wonderful for this project as well!

Gauge for this Crochet Pattern:

Since this is a made-to-measure pattern it is completely adjustable to your size, therefore gauge is not important for this pattern!

Other Materials Required:

  • Super Bulky Yarn (6) (recommendations above)
  • 6.5 mm Crochet Hook ( I used a smaller hook than my super bulky yarn recommends to make sure that my hat was nice and thick, and had no gaps between stitches)
  • Tapestry Needle
  • Scissors

Stitches/Abbreviations (US Terms):

(Click any link to be taken to an instructional Youtube Video )

Notes:

This pattern begins with the ribbing at the bottom of the hat, and then is worked in a round on top of the ribbing. It is best to make the ribbing slightly tighter than required, because crochet work tends to stretch over time.

Free Crochet Pattern Begins HERE:


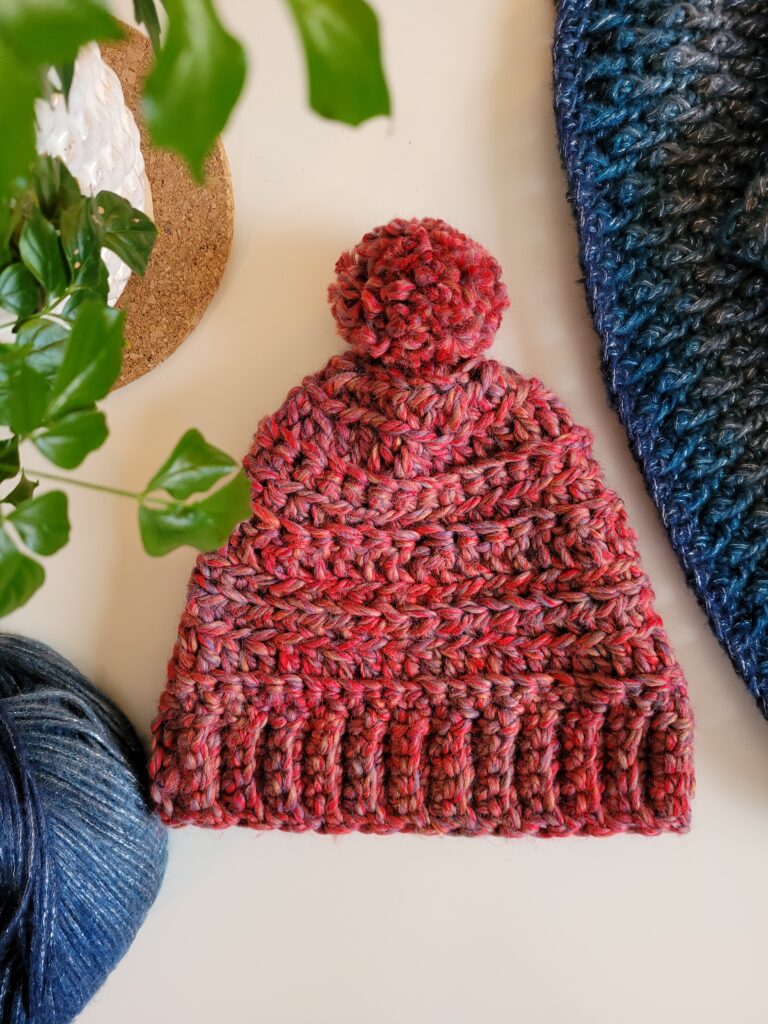
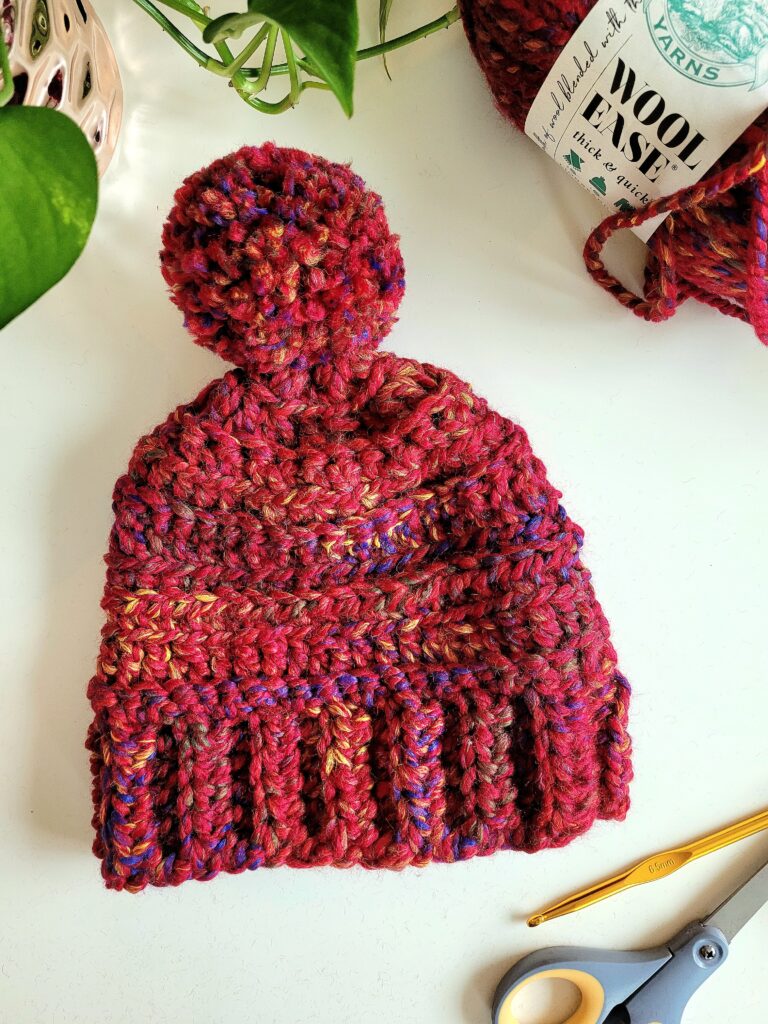
Free Chunky Beanie Crochet Pattern Begins Here:

Row 1:

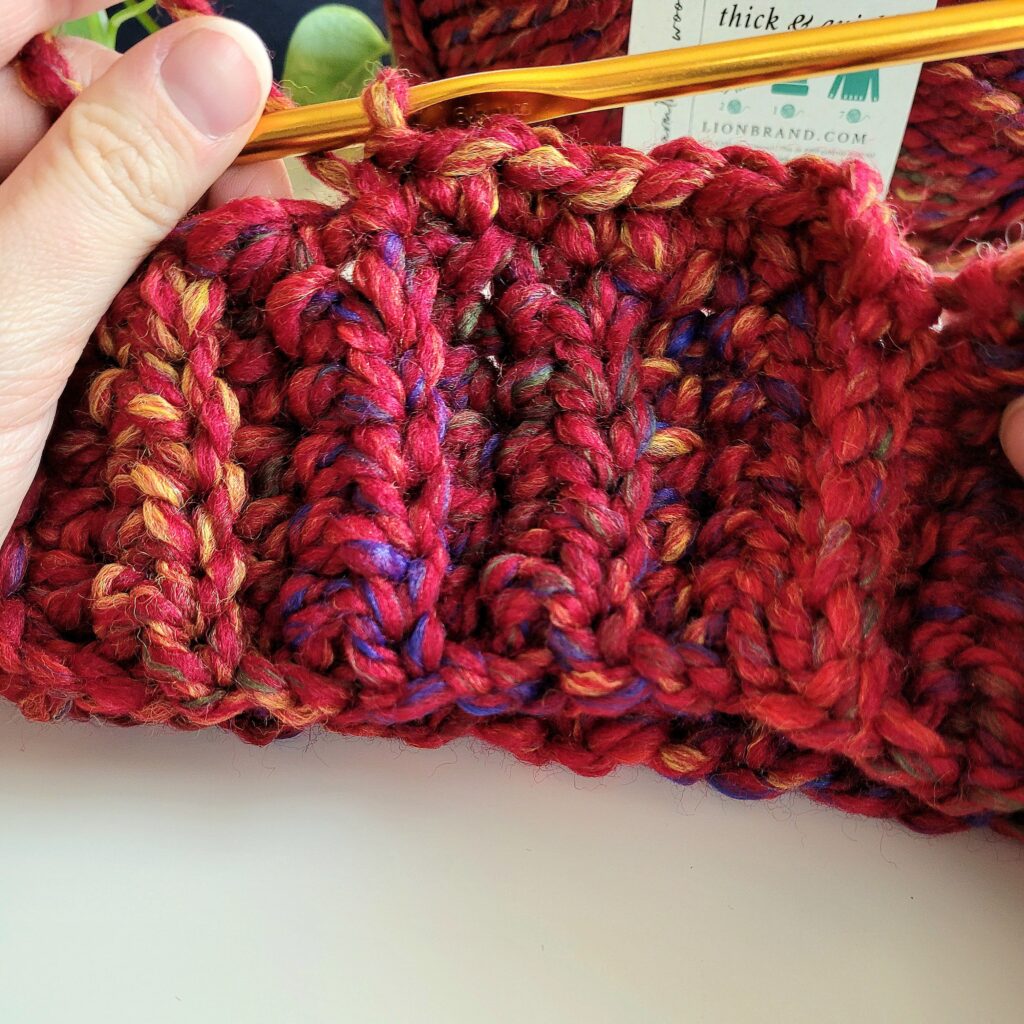
ch 8, hdc in the 3rd loop from hook, hdc across, ch 2, turn

Row 2:

hdc blo across, ch 2, turn

Crochet hat progress

Row 3 - Row ...

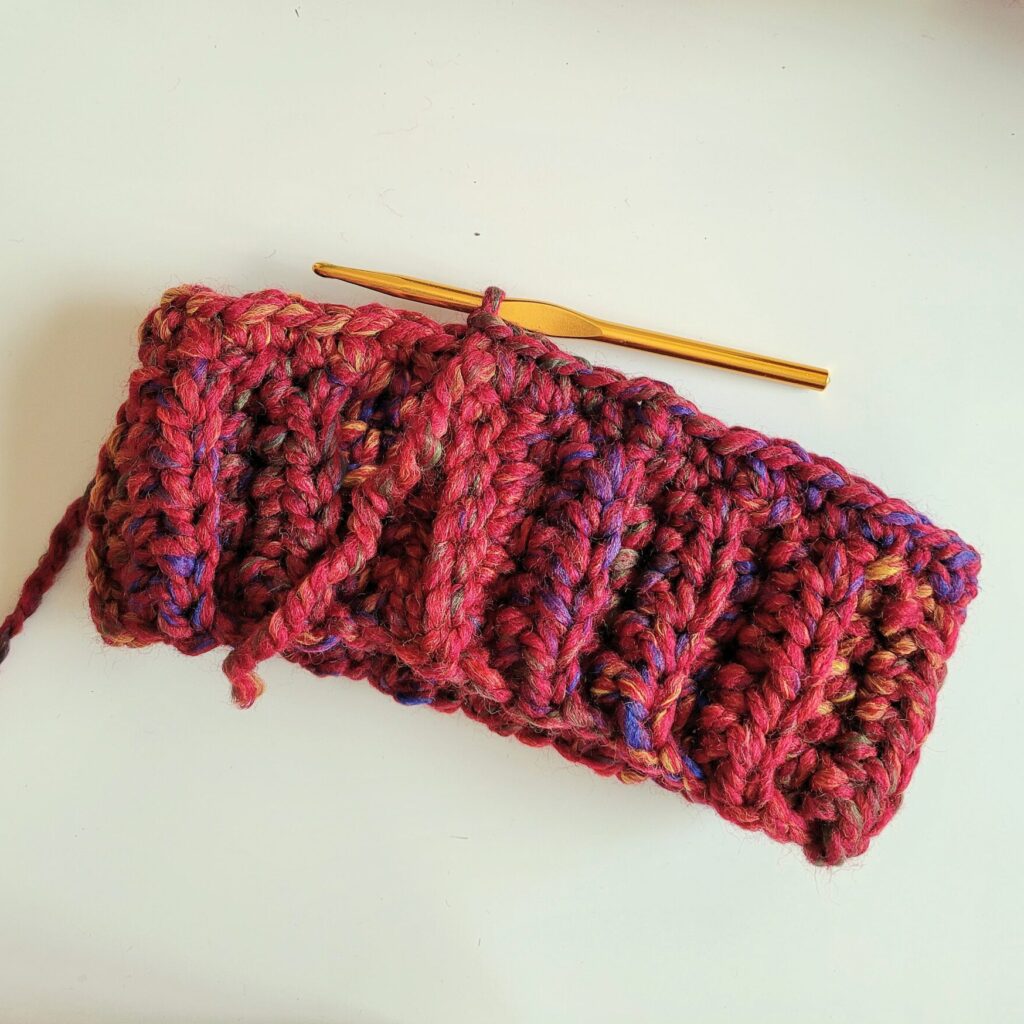
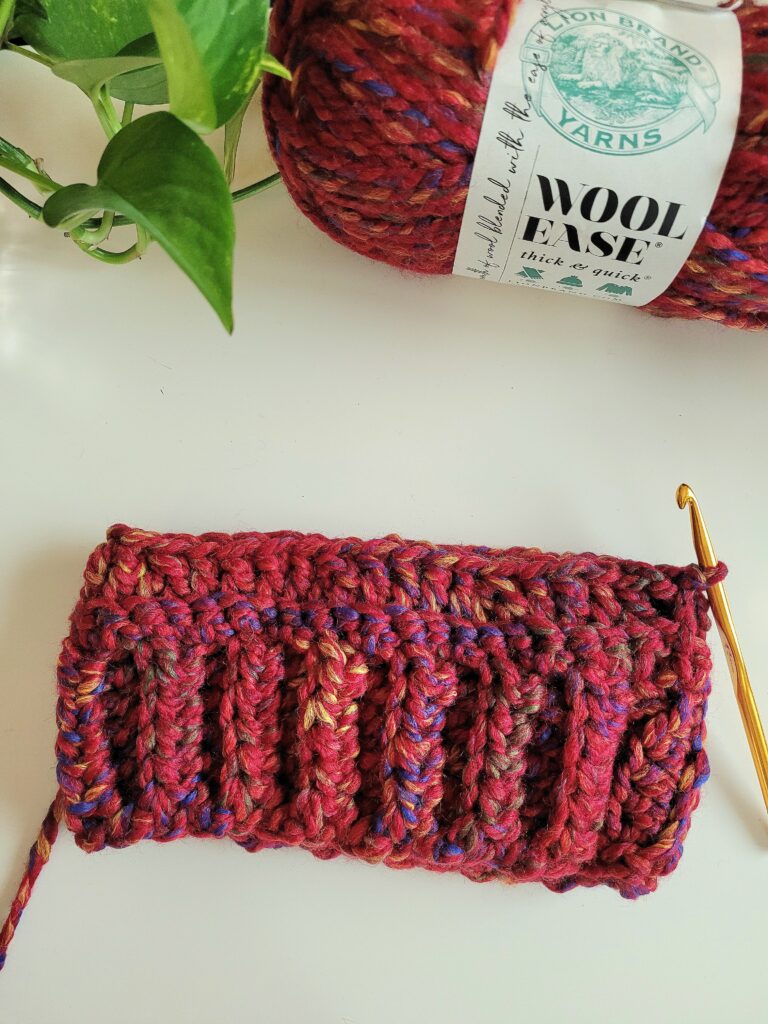
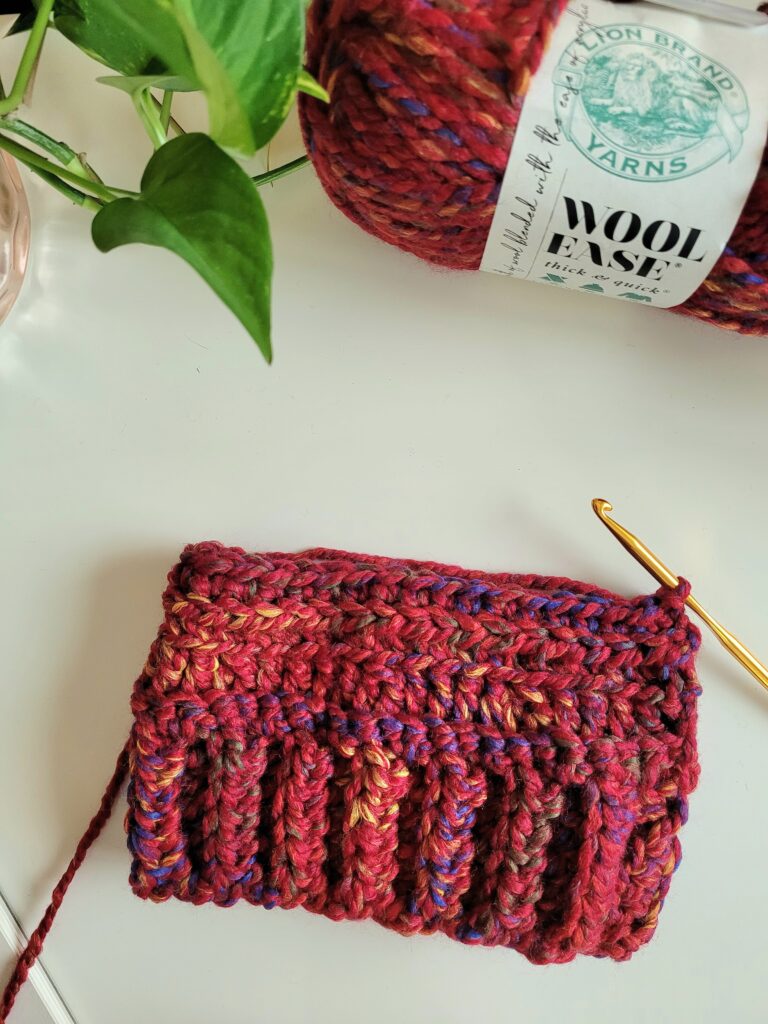
Repeat Row 2 for 27 more rounds, OR however many times needed for the ribbed headband to snuggly fit around your head when slightly stretched - whatever is comfortable, but not too loose so that your hat stays on :)

Crochet hat progress

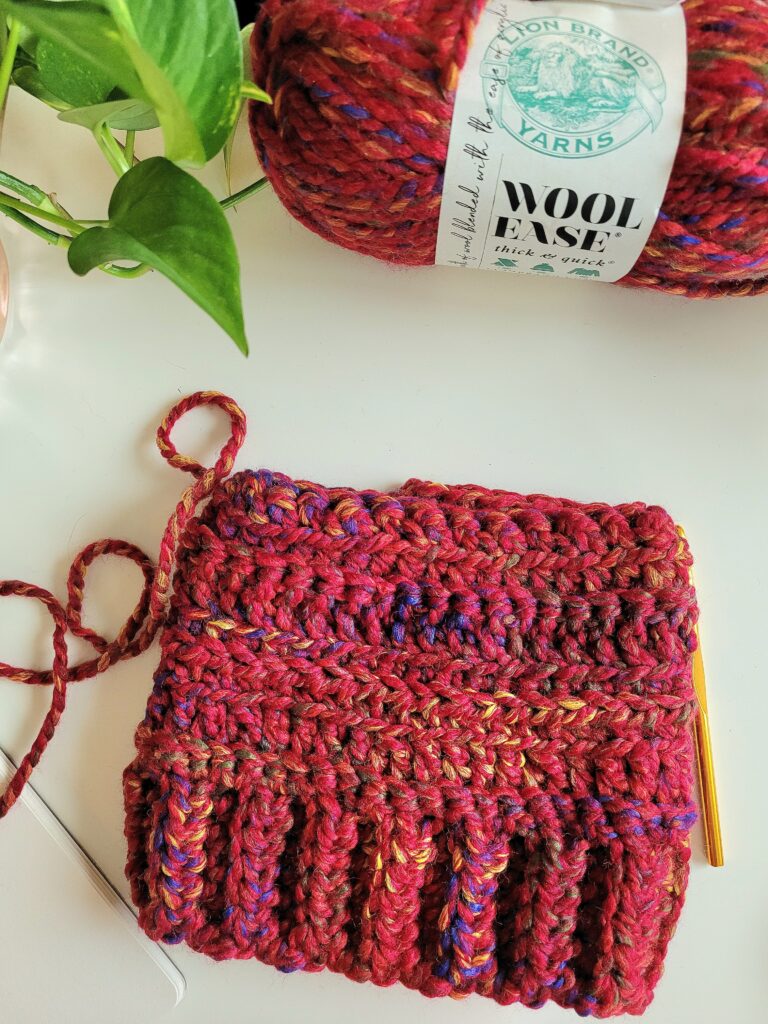
Fold the headband, end to end, then sl st across to connect the two ends

Crochet hat progress

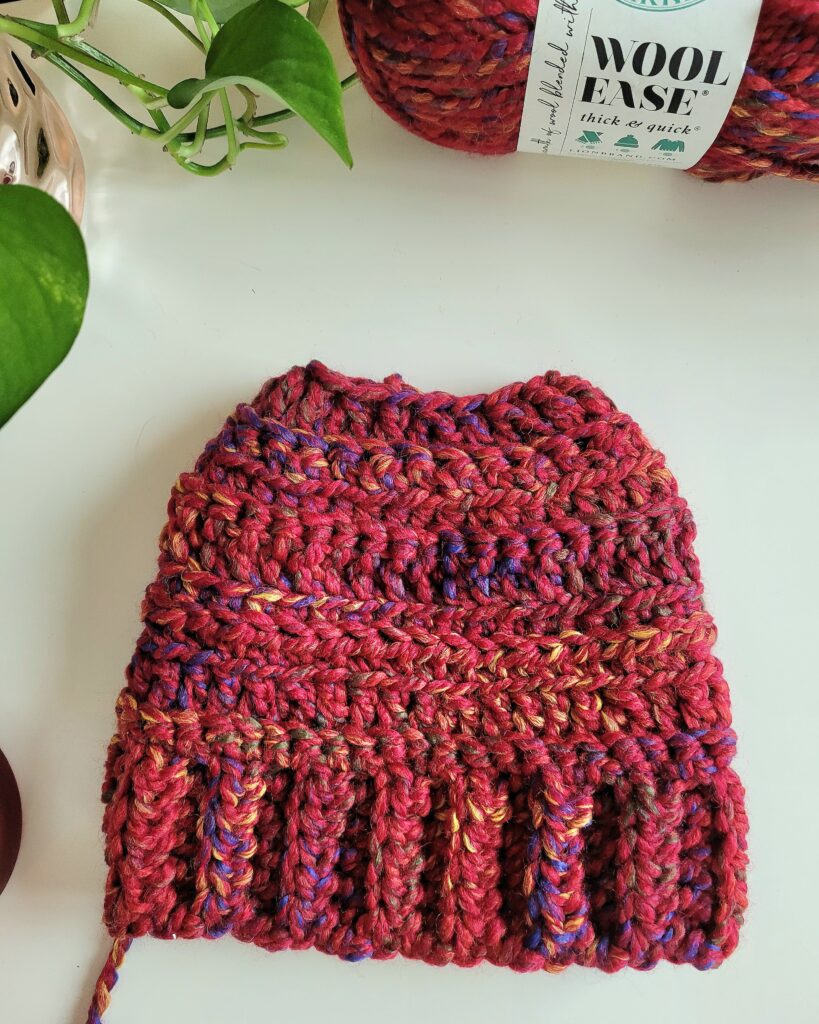
Onto the body of the hat:

Rotate the ribbed headband so that it's horizontal to you, then:

Row 29:

ch 2, sc across the top of the headband, sl st into the 2nd ch, ch 3, turn

Crochet hat progress
ribbed crochet hat base

Row 30:

*dc blo (4 times), dc2tog blo*, repeat *-* until the end of round (it's okay if you end up having to stop in the middle of the cycle - this will depend on how many rows you put in your elastic portion above).

sl st into 3rd ch, ch 2, turn

Crochet hat progress

Row 31:

hdc flo across, sl st into 2nd ch, ch 2, turn

Row 32:

sc blo across, sl st into 2nd ch, ch 3 turn

Crochet hat progress

Row 33:

dc flo across, sl st into 3rd ch, ch 2, turn

Row 34:

hdc blo across, sl st into 3rd ch, ch 2, turn

Crochet hat progress

Row 35:

* sc flo, sc2tog flo*, repeat * - * until the end of round, sl st into 2nd ch, ch 3, turn

Row 36:

* dc flo, dc2tog flo*, repeat * - * until the end of round, sl st into 3nd ch, ch 2, turn

Row 37:

* hdc flo, hdc2tog flo*, repeat * - * until the end of round, sl st into 2nd ch, leave a long tail of yarn, then cut, fasten off
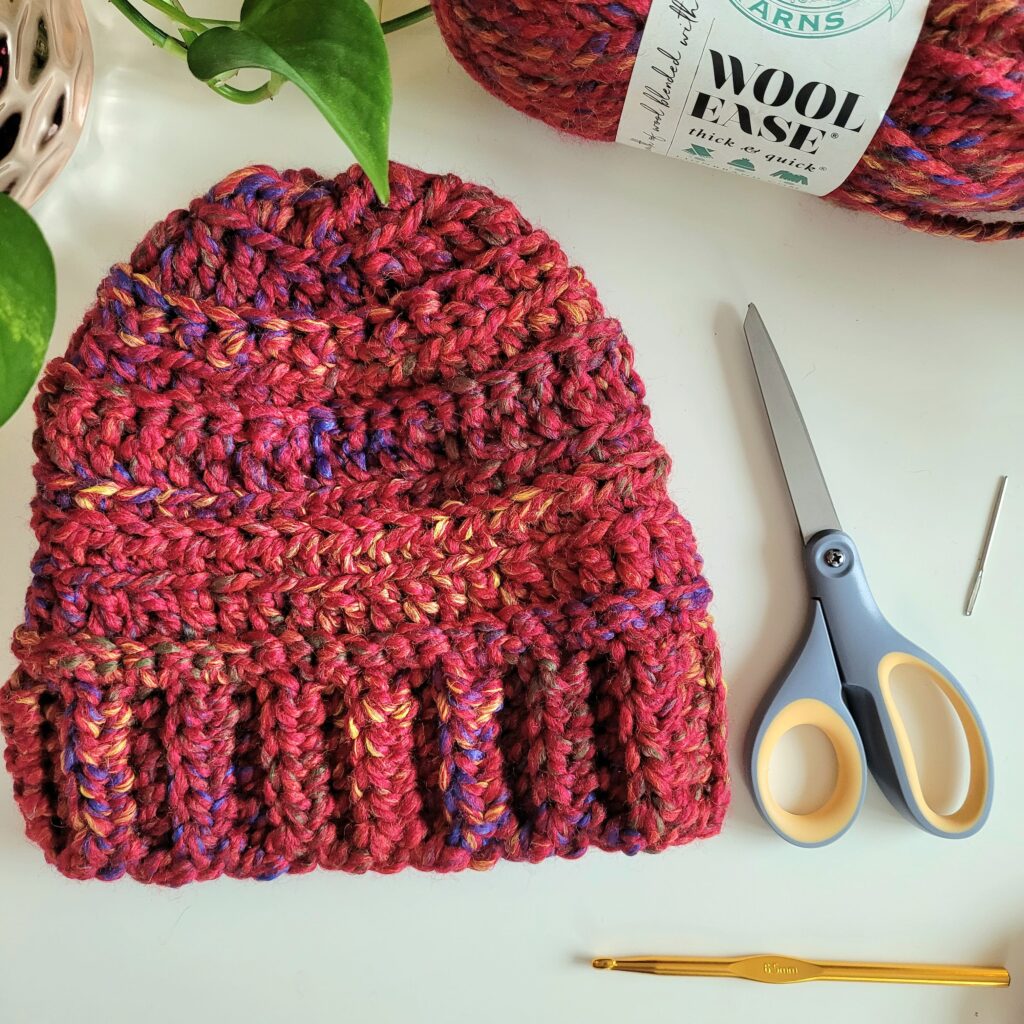
Crochet Beanie Pattern Free

Assembly:

Turn the crochet hat inside out, then using the long tail you left, sew the top of the hat together.

(I usually go around in a circle, and insert my tapestry needle into every third st, and then pull together to tighten)
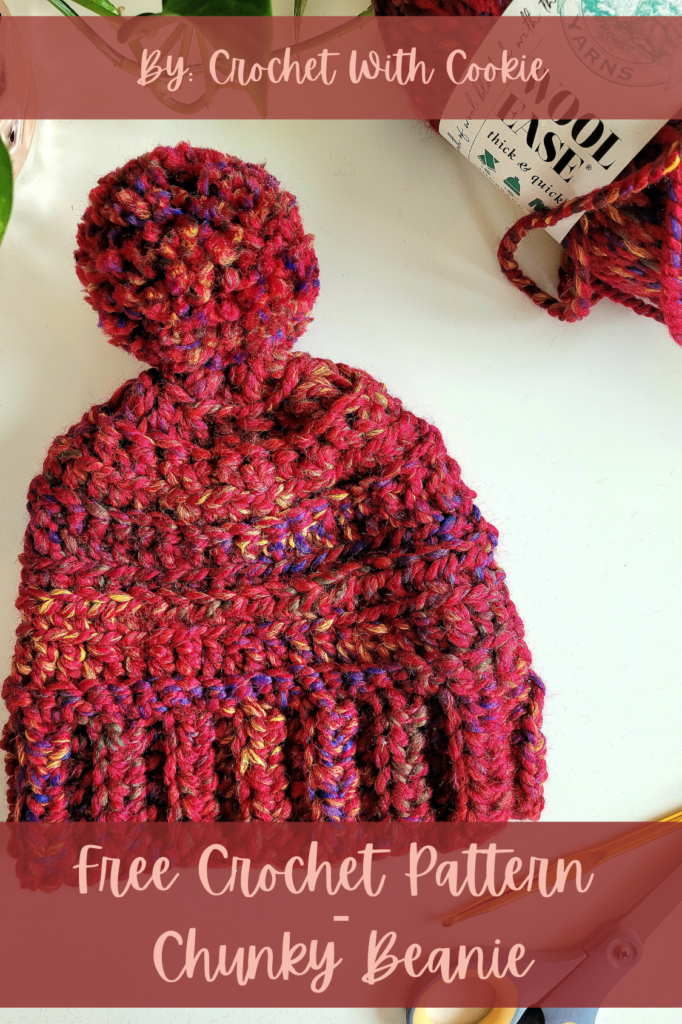
Optional Pompom:

You can create a yarn pompom (as I did here), or you can attach any other! This step is completely optional.

If using your own yarn pompom, attach it first, before weaving in the long piece of yarn that we used to sew the top together, and you can use that yarn to help attach it.

Crochet Beanie Pattern Free

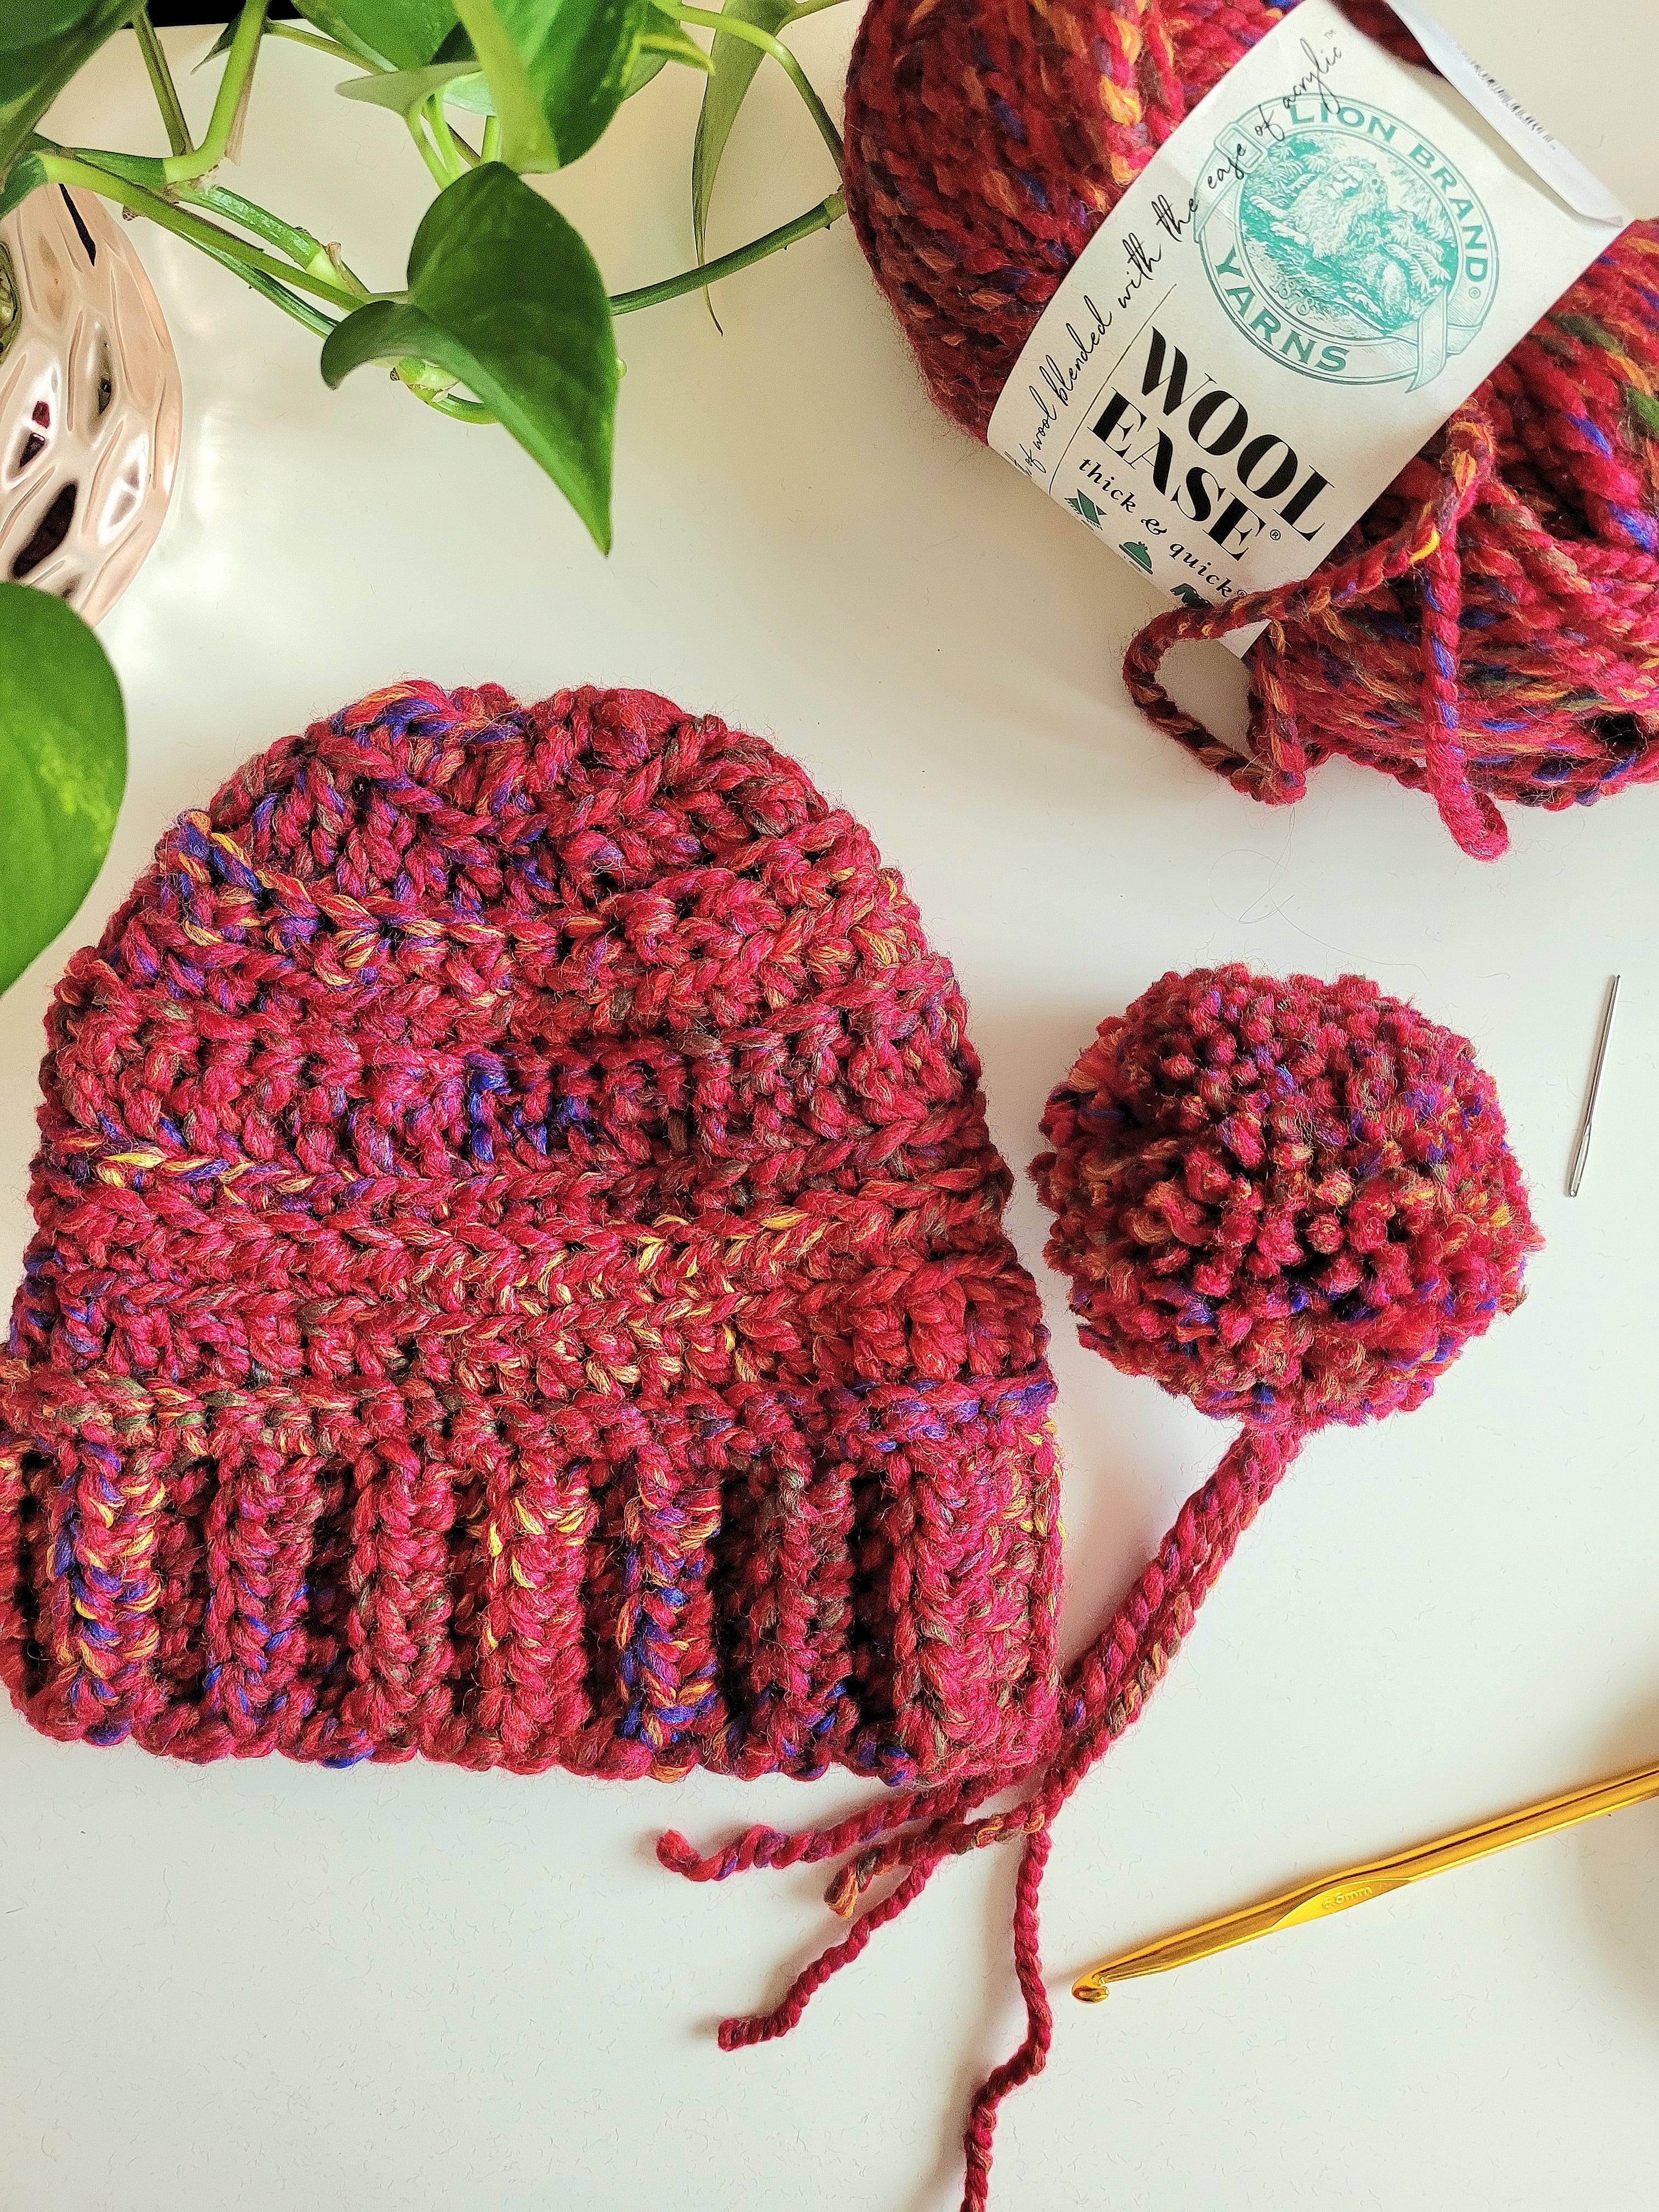
Weave in all ends, and then your brand new chunky crochet beanie is ready!!


I hope you enjoyed this free crochet pattern, and please reach out to me if you have any questions or leave a comment :)

Crochet Beanie Pattern Free
Back to blog

Leave a comment

If you enjoyed this Free Crochet Pattern:

Please share this pattern with your friends, and check out our other patterns below!